FaceTime Like a Pro
Get our exclusive Ultimate FaceTime Guide 📚 — absolutely FREE when you sign up for our newsletter below.

FaceTime Like a Pro
Get our exclusive Ultimate FaceTime Guide 📚 — absolutely FREE when you sign up for our newsletter below.


Windows now offers a text extraction shortcut that quietly became one of my favorite everyday time-savers.
I’ve lost count of how many times I’ve stared at text on my screen and thought, “Why can’t I just copy this?” It might have been text inside an image, a screenshot, a scanned PDF, a paused video, an error message, or a website that simply wouldn’t let me select and copy something.
So I did what most people do: I typed it. Sometimes it was just a sentence, a long error message, or a URL with enough random characters to make typing it manually frustrating. But not anymore, as Windows can now extract text from the screen with just a keyboard shortcut.
Here’s how to use the hidden Windows shortcut for faster copying.
For a feature this useful, Windows hides it surprisingly well. I accidentally stumbled upon a new text-extraction feature in the Snipping Tool. It uses OCR (optical character recognition) to find text inside a screen capture and turn it into something you can copy and paste.
Microsoft says you can use Text Actions to extract text from an image, copy everything in the selected area of the screen, and even quickly redact things like email addresses and phone numbers. The interesting part is that you can access the tool only by pressing the Win + Shift + T shortcut.
Therefore, I don’t need the original text to be selectable. If it’s visible, Windows can try to read it. That makes the shortcut useful for copying text from:
I don’t use Win + Shift + T instead of traditional Ctrl + C and Ctrl + V. I use it when normal copy and paste fails me. That’s why it has become one of my favorite Windows shortcuts.
I used to have a complicated process for copying text that wasn’t selectable. If the text was in an image, I’d sometimes search for the original image or website, pause the video to type what was on the screen, or manually type the error message into Google.
And if the text was particularly annoying, I’d take a screenshot and then open it in another app to extract the text. These little interruptions add up to tank my productivity.
The worst one was probably the error messages. You know the ones: a long string of technical text that you want to search online. The message is sitting right there on the screen, but you can’t select it. So you start typing. One wrong character later, your Google search is useless.
With Win + Shift + T, that’s usually no longer necessary. I can select the error message, copy the extracted text, paste it into a search engine, and get back to the actual task. It sounds like a tiny improvement, but it’s worth knowing to save time and effort.
Using the Windows text extractor is remarkably simple.

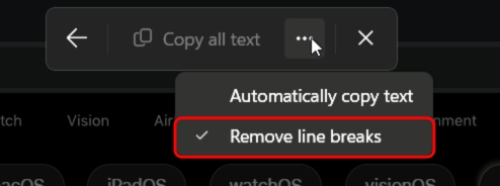
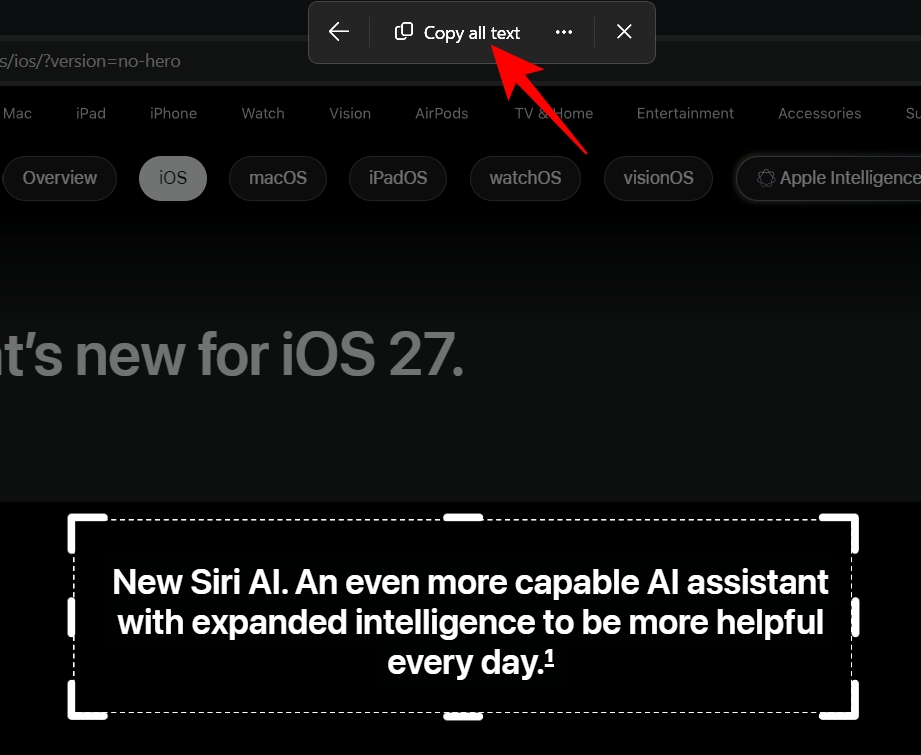
That’s it. The entire process takes only a few seconds and successfully recognizes custom fonts and text on difficult backgrounds.
Tip: As I use the feature all the time, I have enabled automatic copying. After pressing the shortcut, click the three-dot icon on the toolbar and select Automatically copy text.
The interesting thing about Win + Shift + T is that I didn’t immediately start using it everywhere. It gradually replaced all those browser extensions, PowerToys, and online OCR services.
Here are the situations where it has become part of my regular workflow:
This is probably one of the most useful situations. When troubleshooting Windows, you may come across error messages, warning dialogs, installation screens, software license keys, command output, or technical information that you need to search for online.
Instead of typing a long string character by character, I resort to the OCR shortcut to pull the text right off my screen and paste it into a search engine, a support forum, or a chat with someone helping me troubleshoot the problem.
OCR also comes in handy during everyday Office work. Sometimes the information I need is sitting inside reports, charts, slide decks, or scanned contracts rather than in an editable format.
For example, if someone sends you a screenshot containing a few figures, a reference number, or a paragraph that you need in Word or Excel, you can select the text directly instead of retyping it.
This is especially useful for small pieces of information. The shortcut lets me handle that small task quickly without turning it into a separate document-conversion project.
During research, I often come across useful text that appears in a format where standard text selection doesn’t work. It could be a screenshot from an online lecture, an eBook, a diagram with labels, a PDF handout, a scanned page, or an image containing a definition or quotation.
The OCR shortcut gives me a quick way to pull that information into my notes. I can select the relevant section, copy the extracted text, and put it alongside my other study material.
There are plenty of small, unremarkable situations where the shortcut is useful too.
Maybe I have a tracking number in a screenshot, a phone number displayed in an image, an address on a digital flyer, recipe ingredients from a cooking video, or some text in a photo that I want to search or send to someone. These aren’t tasks that justify installing a dedicated OCR app or PDF editor, or setting up a complicated workflow.
In such cases, simply use the shortcut, select the text, and move on.
Older documents are often stored as scans or images, which means the text may not be selectable even though it is perfectly readable.
When I need a particular name, date, reference number, or passage from one of these documents, there is no need to convert the entire archive into searchable PDFs. Just use the OCR shortcut on the relevant page and extract the required section.
Another practical advantage is that you can use the OCR capability as part of your existing Windows workflow rather than reaching for a separate OCR website or application.
For a one-off extraction, opening another service feels daunting. It requires you to upload the image, wait for it to process, copy the result, and potentially deal with formatting. With the shortcut, the text is already on my screen, so I can work with it immediately.
I don’t want to oversell this. Win + Shift + T is useful, but it isn’t magic.
It uses OCR, and the recognizer can make mistakes. If the text is blurry, tiny, distorted, heavily stylized, or set against a complex background, the extracted result might need some cleanup.
I’ve also learned not to blindly trust extracted text when accuracy really matters.
For example, you should always double-check:
One wrong character can completely change the meaning.
Moreover, it works with rectangular selections, so you can’t precisely outline text while excluding nearby icons, graphics, or other on-screen elements. If those elements are close to the text you’re trying to capture, the OCR may pick up extra characters or information.
In such instances, the simplest way out is to modify the selection and attempt it once more. If the unwanted text is only a few characters, I simply remove them after pasting the result into a document. It’s a small extra step, but still quicker than typing the entire selection manually.
Once I started paying more attention to Windows keyboard shortcuts, I realized that Win + Shift + T isn’t the only one that makes working with text easier.
These are the ones I use most.
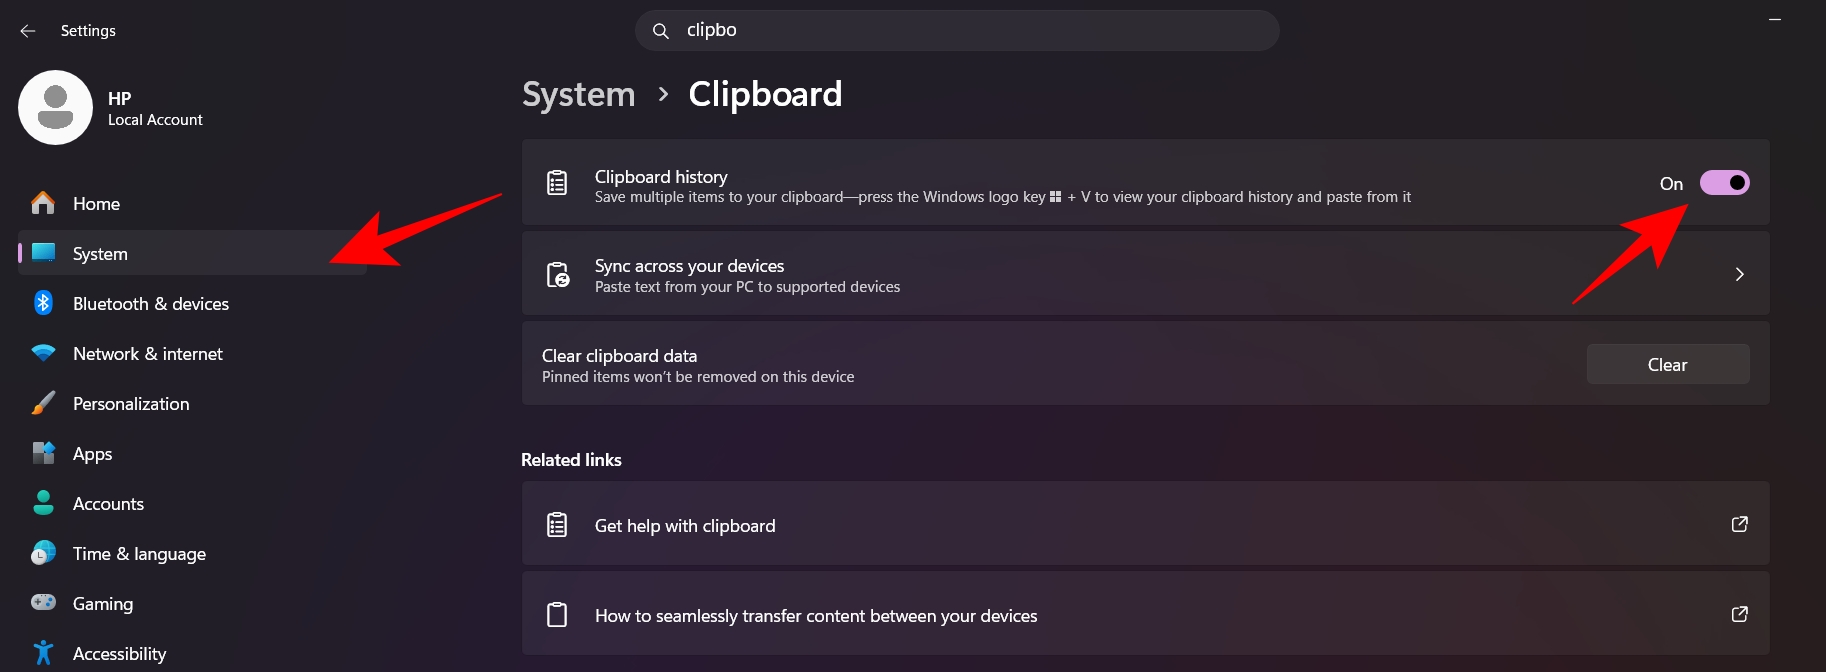
The Windows OCR shortcut is a small feature that can make everyday work noticeably easier. Whether I’m copying text, grabbing information from screenshots, or switching between different pieces of content, it saves time and reduces unnecessary retyping.
It’s simple, practical, and easy to build into your routine. I just wish I’d started using it years ago. And if you’re using Windows 11 and you’ve never tried Win + Shift + T, I’d suggest pressing it the next time you see text you can’t copy.
You might end up wondering, as I did: Why was I typing all of this myself?
You may like to read: