")
FaceTime Like a Pro
Get our exclusive Ultimate FaceTime Guide 📚 — absolutely FREE when you sign up for our newsletter below.

FaceTime Like a Pro
Get our exclusive Ultimate FaceTime Guide 📚 — absolutely FREE when you sign up for our newsletter below.
Seeing “iPhone is Disabled, Connect to iTunes” can be stressful, but you’re not stuck forever. Here’s how to unlock your iPhone safely and recover access.
Seeing the message “iPhone is Disabled. Connect to iTunes” on your screen can feel like a nightmare. Whether it was you, your kid, or your pocket entering the wrong passcode too many times, the result is the same: you’re locked out. But don’t panic. There are ways to unlock your iPhone. However, you will lose your data unless you have a backup already. Let’s get started.
Apple built this lockout system to protect your data. After six wrong passcode attempts, your iPhone disables for one minute. Keep guessing, and the lock time increases: 5 minutes, 15 minutes, 1 hour. After too many failed tries (usually 10), your iPhone either disables permanently or, if you enabled it, erases itself completely.

Before jumping into the recovery steps, here are a few important things you should understand. These points will help you know what to expect and avoid surprises later on:
Many third-party tools claim to unlock your iPhone, but most are not safe to use. Stick to official methods.
You’ll need a device that uses the same Apple ID, or you can restore using any Mac or Windows PC.
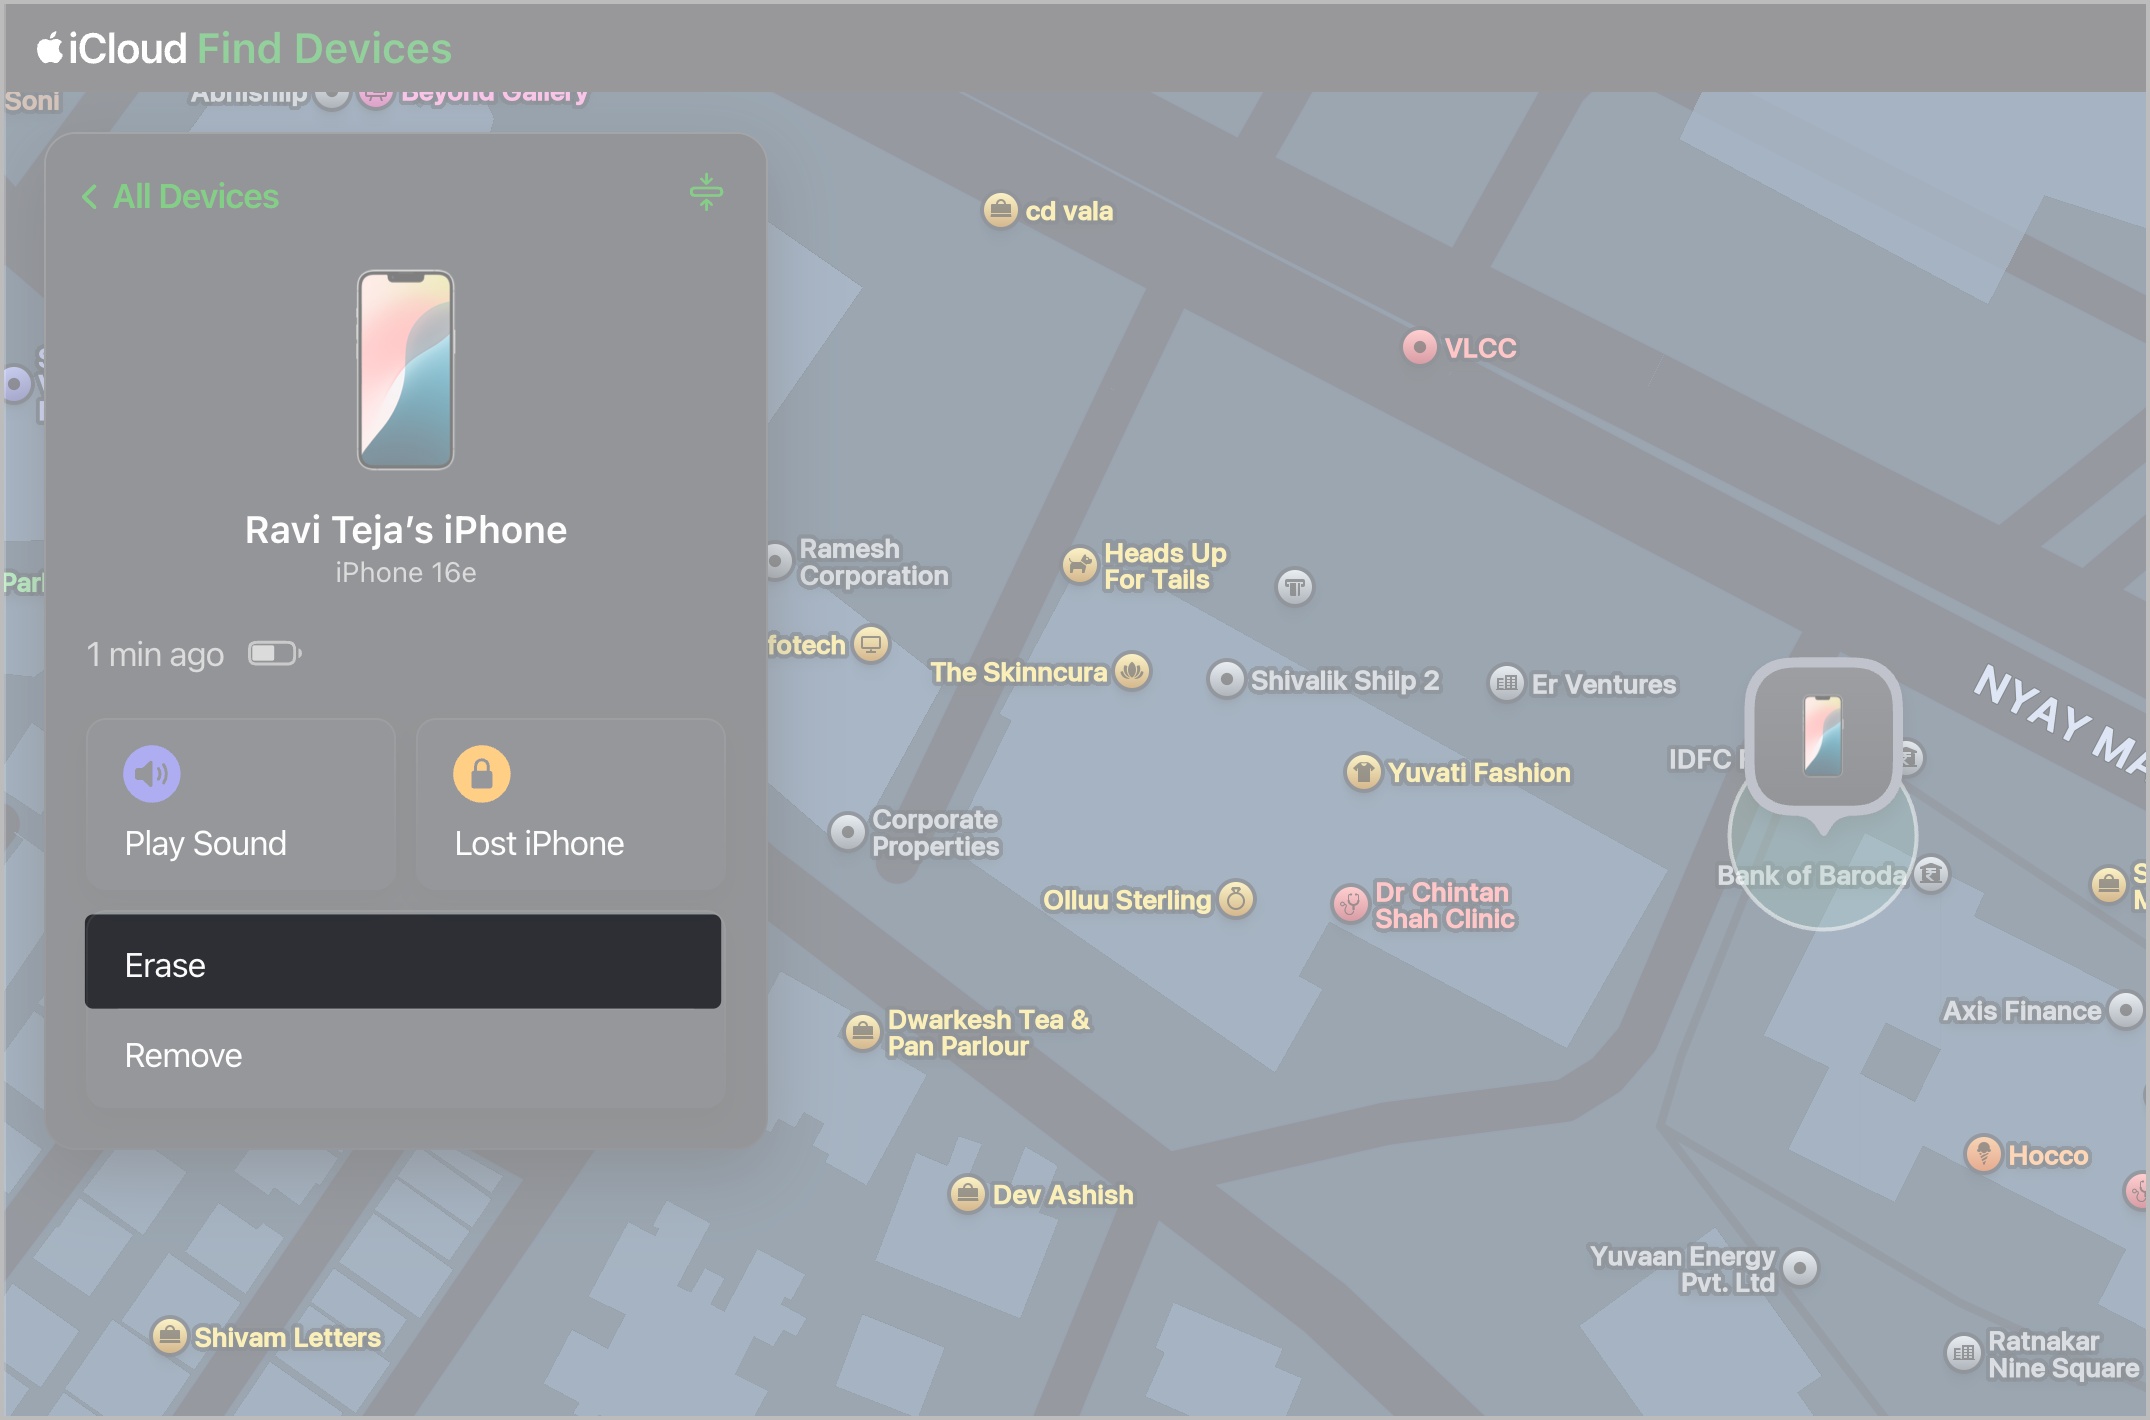
If you had Find My iPhone enabled, this is the easiest way.
If iCloud isn’t an option, you’ll need a Mac or PC with iTunes or the Apple Devices app.
Before you can enter recovery mode, power off your iPhone completely.

Connect your iPhone to your computer using a Lightning or USB-C cable. Immediately press and hold the correct button based on your model:
Keep holding until the recovery mode screen appears, showing a cable and computer icon.

Check out this guide for clear, step-by-step instructions on how to put your iPhone into Recovery Mode.
Once you’re in recovery mode, your computer will prompt the next steps:
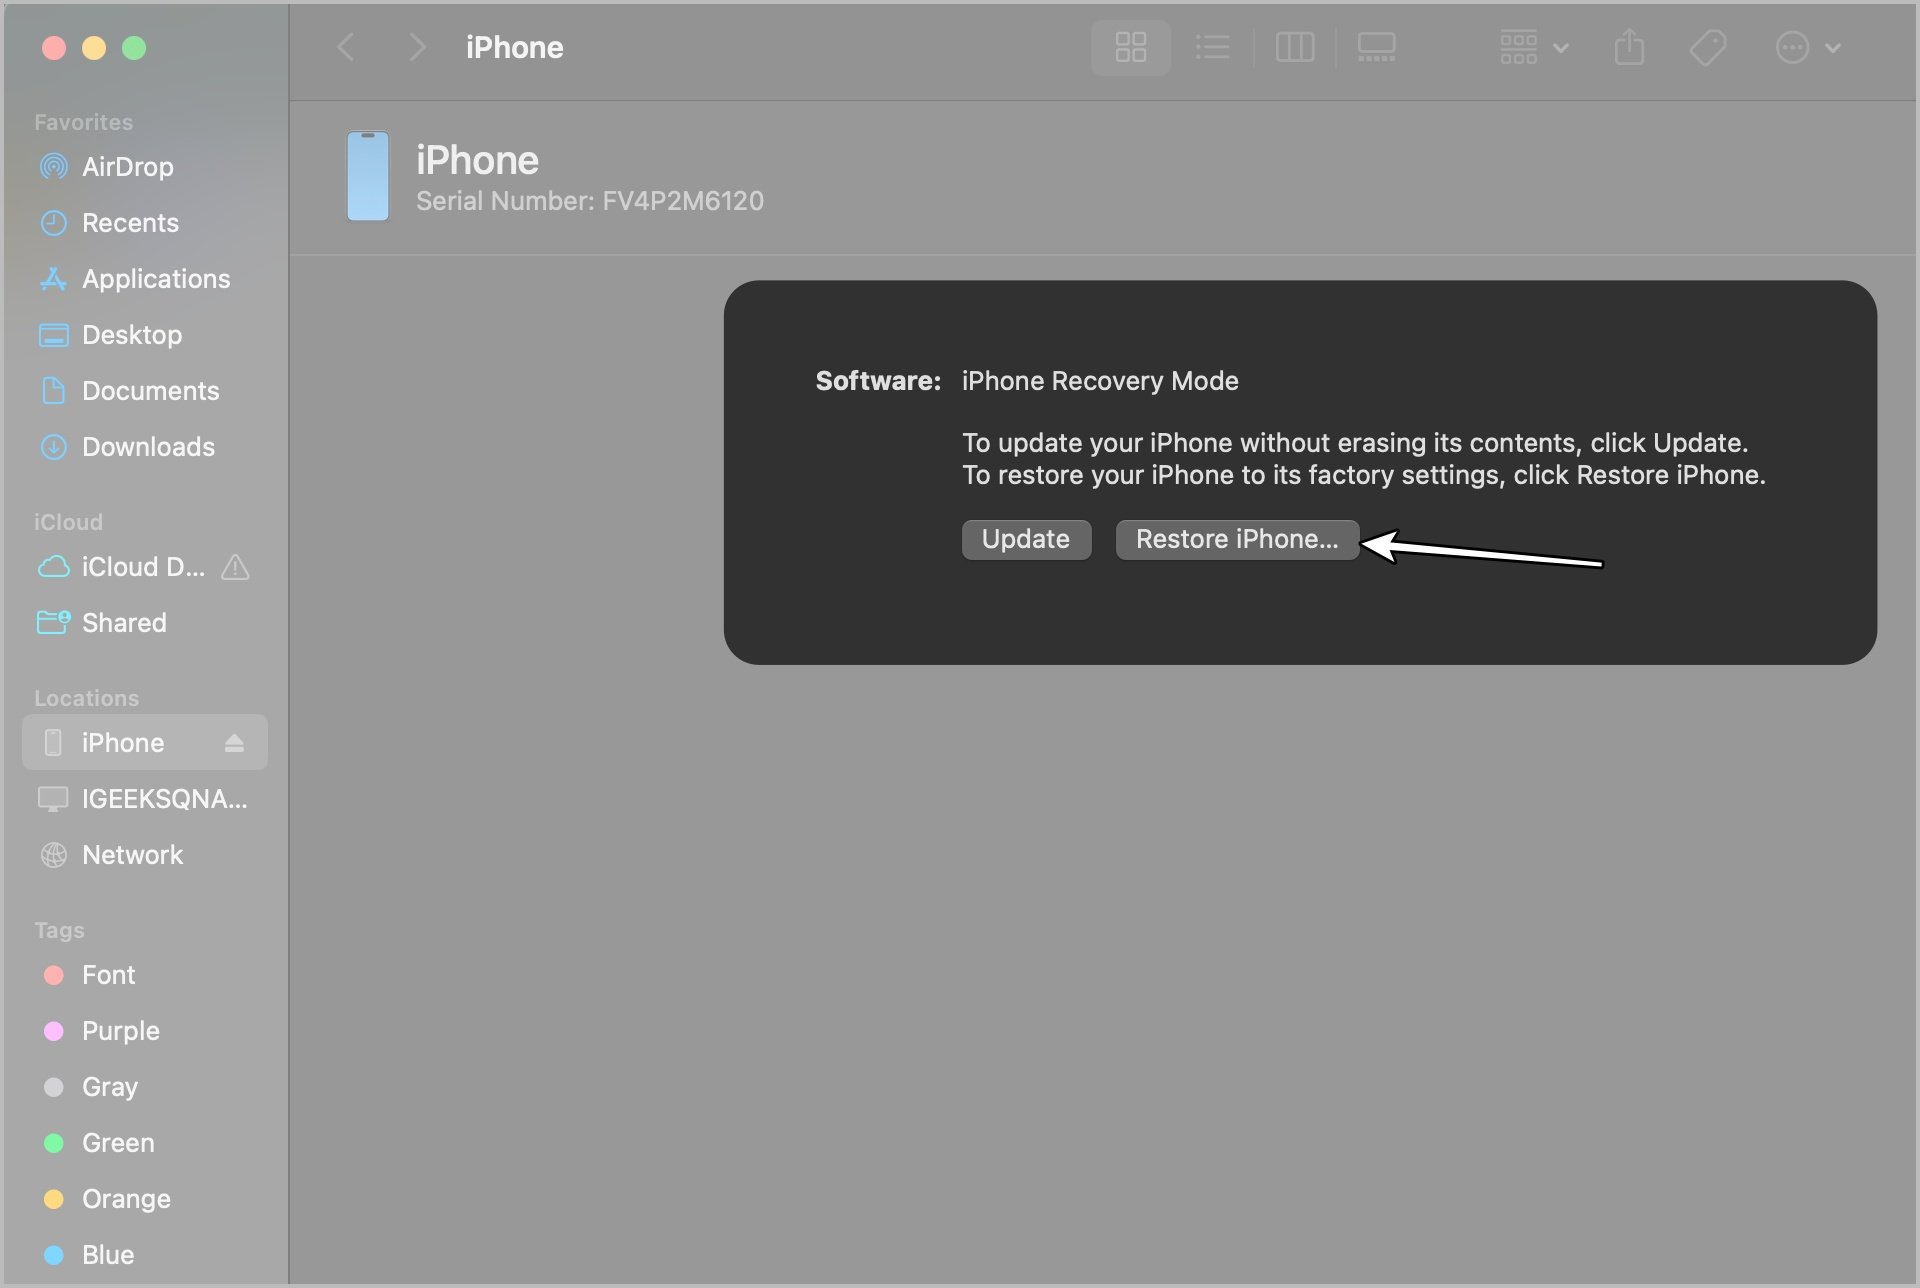
Once done:
If recovery mode doesn’t work, DFU (Device Firmware Update) mode is your next option. This deeper restore method can help when your iPhone refuses to restore normally.
Put your iPhone into DFU mode (steps vary by model), connect it to your computer, and restore it using Finder or iTunes. This wipes everything and gives your iPhone a completely fresh start. Use it only if you’re comfortable with advanced troubleshooting.
Still Stuck? Contact Apple Support
If you’re still having trouble unlocking your iPhone, reach out to Apple Support. They can help walk you through your options and check for any hardware-related issues.
Here are some practical tips to prevent being locked out again:
Getting locked out of your iPhone can be stressful, but it’s not the end of the world. Apple has built-in recovery tools that can help you regain access. Just remember, recovery means erasing your iPhone, so having a backup is critical.
And maybe, just maybe, keep your phone away from curious toddlers next time.
Don’t miss these related reads:


