How to start Mac in Recovery Mode
Starting your Mac in Recovery Mode can be useful if you run into issues that prevent the device from working properly. On both Apple Silicon and Intel-based Macs, Recovery Mode provides useful tools to diagnose and fix problems that basic troubleshooting can’t.
However, it might be difficult to access Recovery Mode if you are new to macOS or aren’t tech-savvy. Therefore, in this step-by-step guide, I’ll explain how to start Recovery Mode on your Mac. But first, let’s understand what Recovery Mode is and what you can do with it.
What is Recovery Mode on Mac?
Recovery Mode is a special boot environment in macOS that provides access to a suite of powerful utilities and tools designed to fix various software and hardware issues on Macs.
Files for Recovery mode are stored on a separate partition from the one used to boot macOS. You can consider Recovery Mode as an isolated mini-operating system that can run independently from macOS, allowing you to access critical recovery tools without affecting your primary installation.
Recovery Mode essentially serves as a lifeline when your Mac fails to operate normally. It offers a safe and controlled environment to diagnose and fix issues.
Things you can do in Recovery Mode on Mac
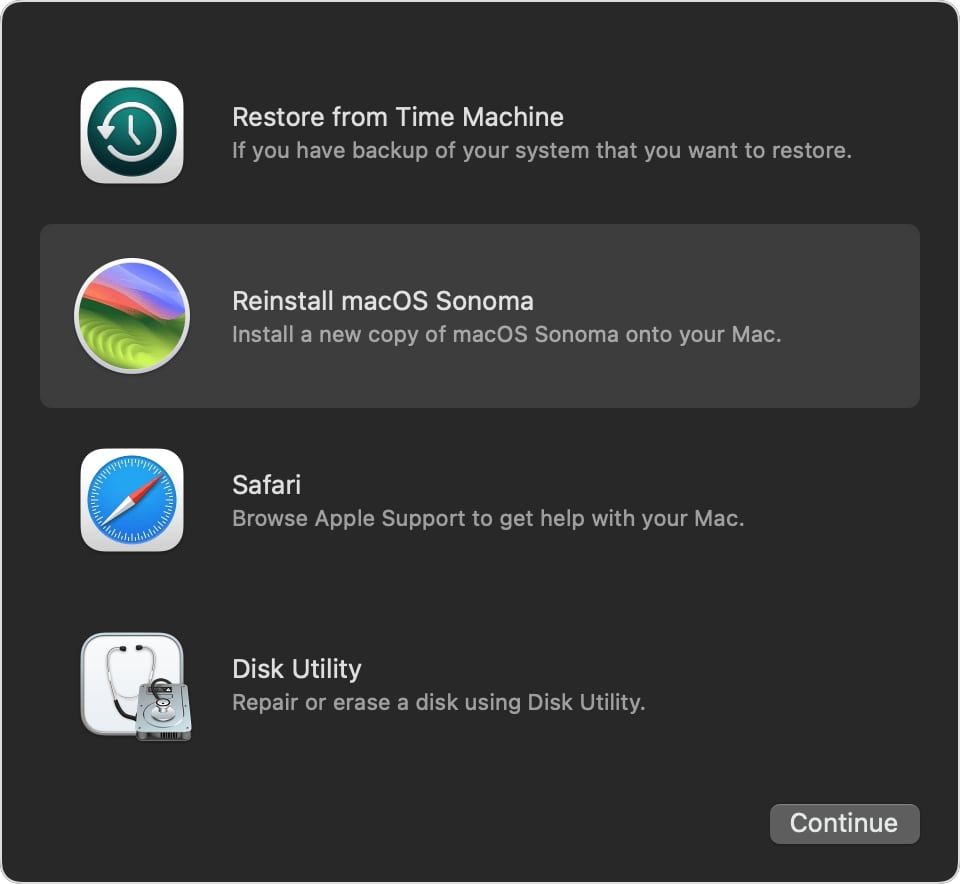
- Reinstall macOS on your Mac if you’re experiencing major software issues.
- Use Terminal to access helpful command-line tools.
- Restore your files from a Time Machine backup stored on an external drive.
- Set a Startup Disk if you have connected several bootable drives to the Mac.
- Access and use Share Disk to transfer your files between compatible Macs.
- Open Disk Utility so you can fix disk errors or completely erase your Mac.
- Access Safari to quickly troubleshoot any issue and contact Apple Support.
How to start Apple Silicon Macs in Recovery mode
If you are using a Mac running on an M1, M2, or M3 series chip, you need to follow the steps below to boot Mac in Recovery Mode.
- Click the Apple logo in the Menu bar → Select Shut down.
Wait till your Mac’s screen/monitor is completely turned off.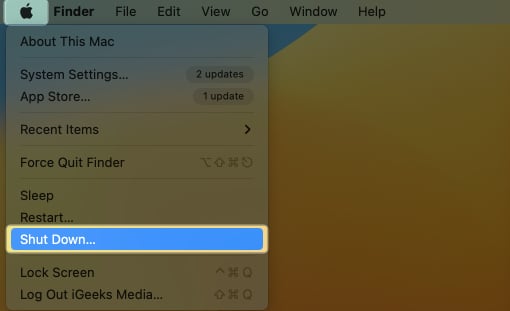
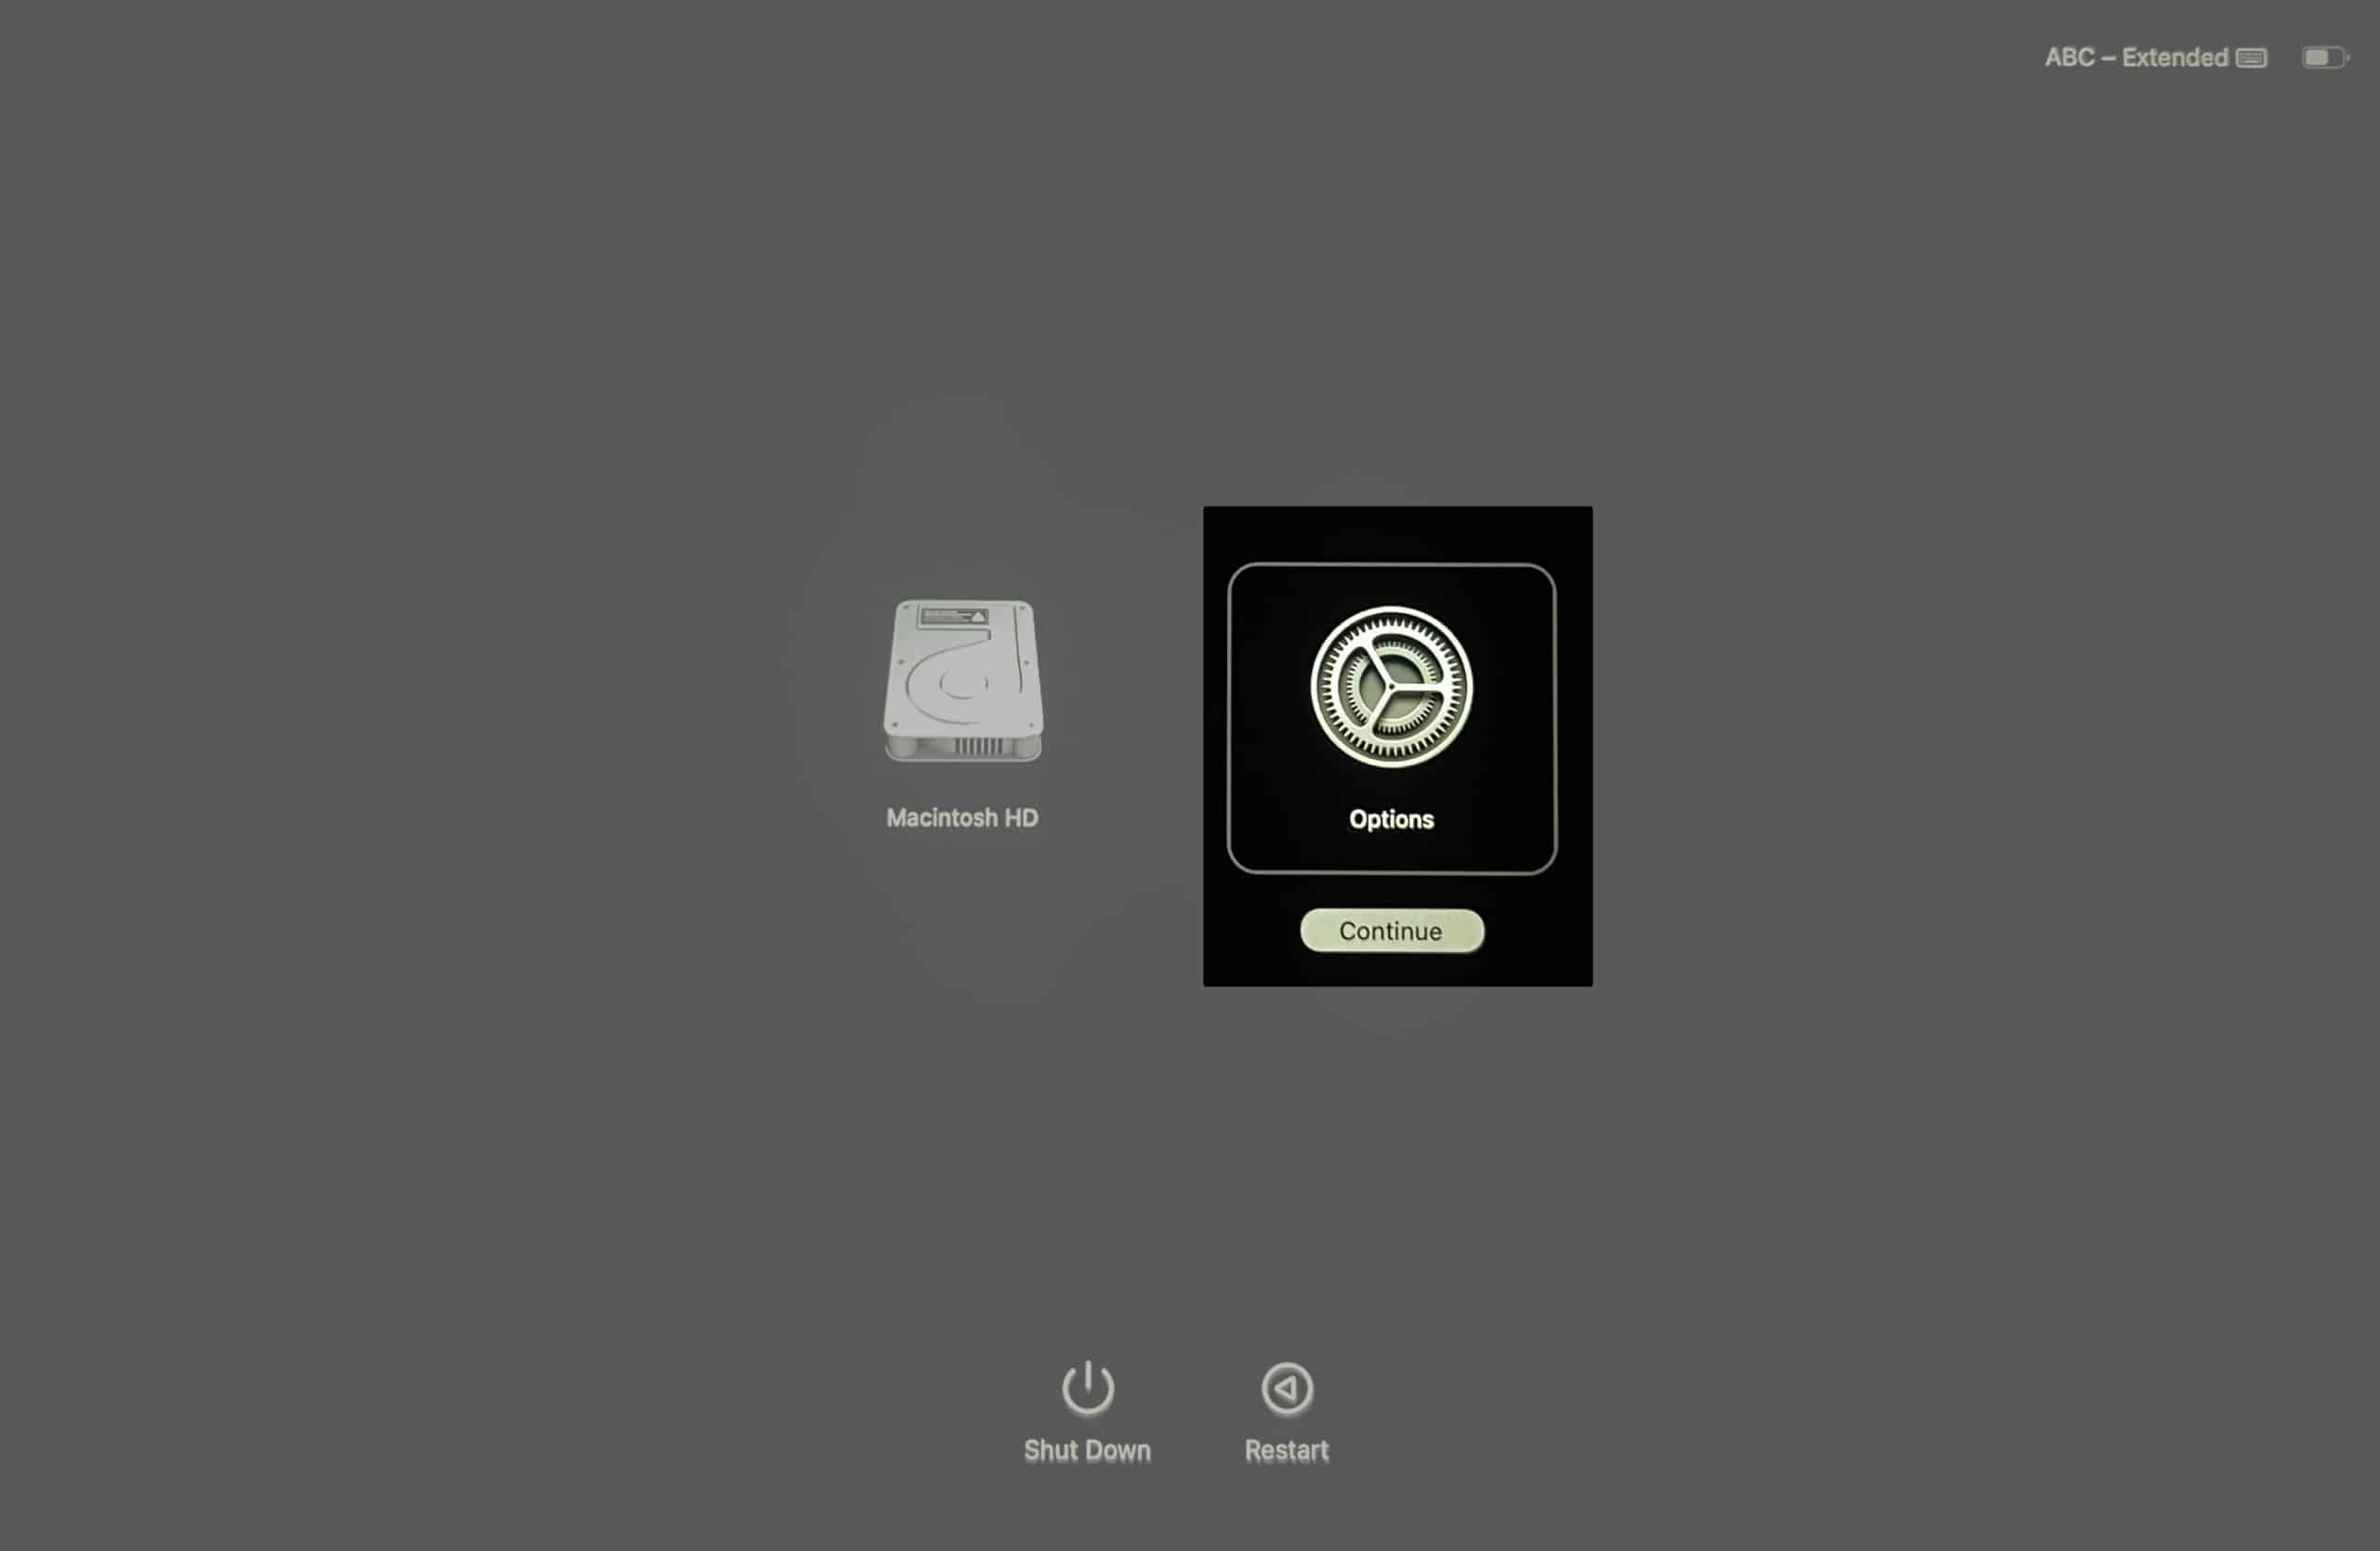
- Immediately press and hold the power button on your Mac.
Hold until you see a system volume and an Options button. - Now, select the Options button → Then, click on Continue.
- If asked, select a volume you wish to recover → Click Next.
- Select your Mac’s administrator account → Then, click Next.
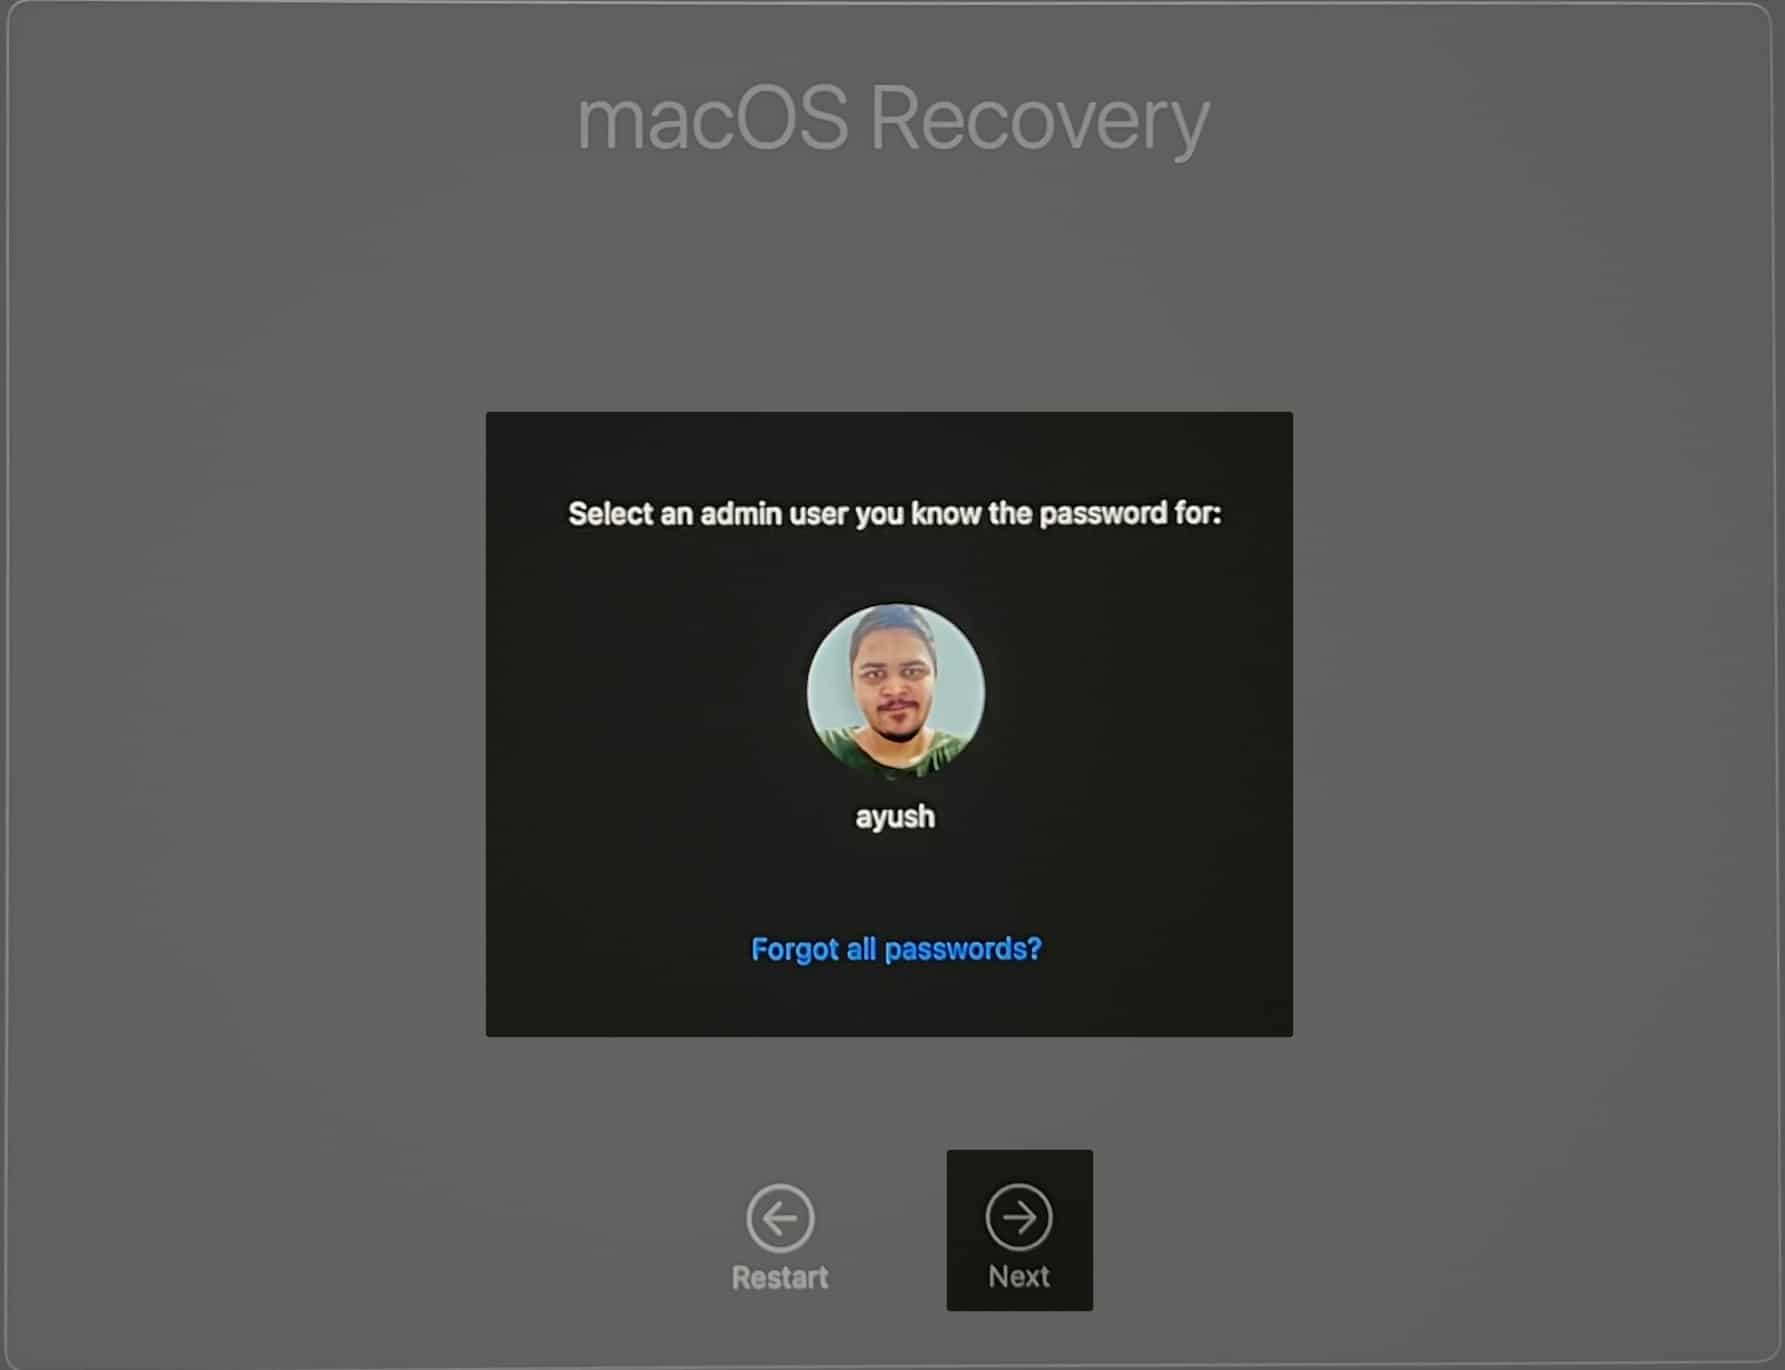
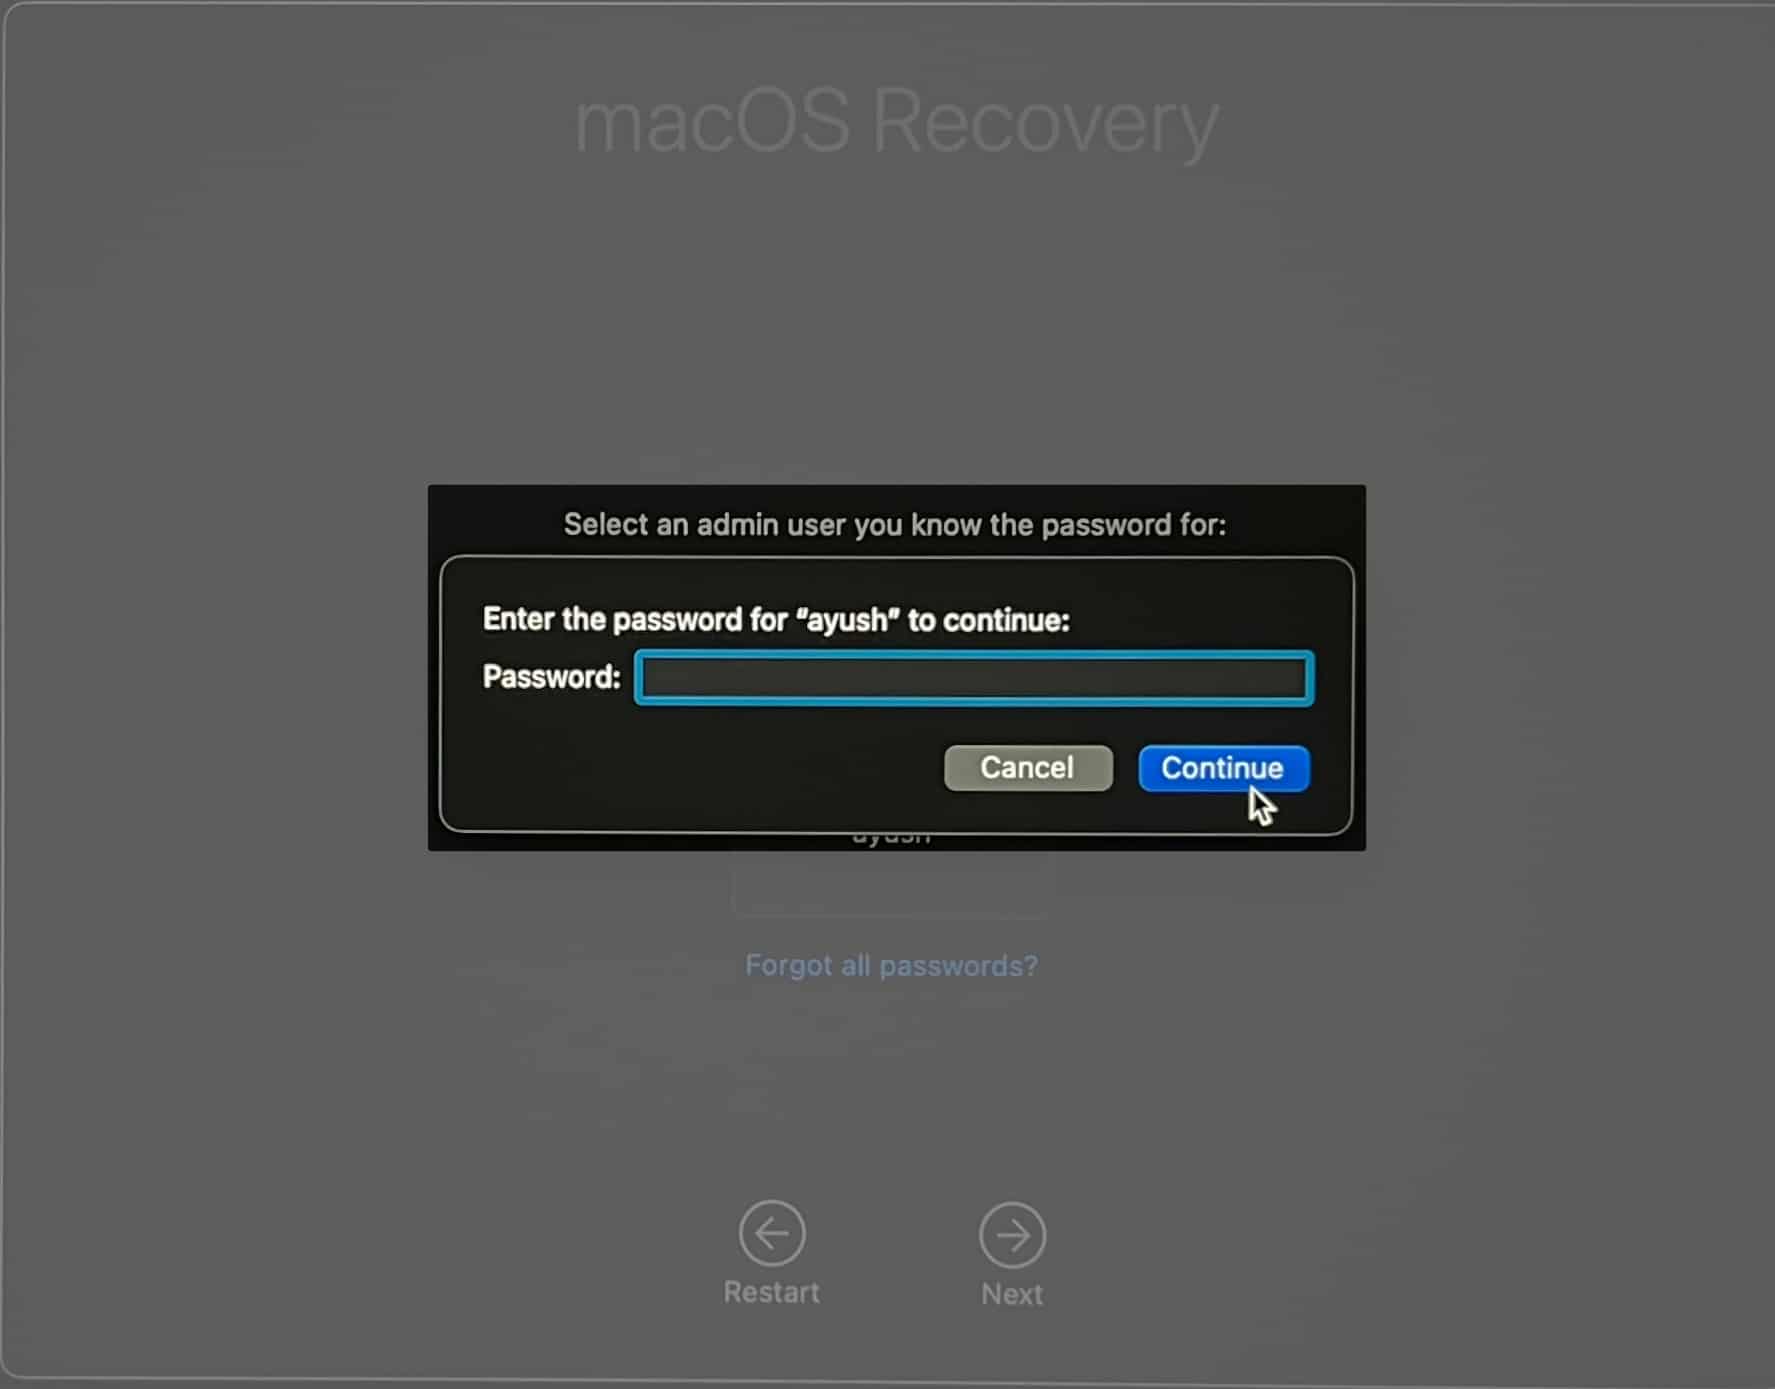
- Enter the password for the account → Then, click Continue.
How to start Intel-based Macs in Recovery mode
Unlike Apple Silicon Macs, steps to access Recovery mode on Intel-based are somewhat different and require users to press a key combination during the boot sequence. Here’s how it all works:
- Restart your Mac by holding the power button for at least 30 seconds.
- Once you see the Apple logo, press and hold the Command + R keys.
You can also follow these steps to access Recovery mode during boot.
- If you see a lock, enter the administrator password for your Mac.
- If needed, select a volume you wish to recover → Click Next.
- Select your Mac’s administrator account → Then, click Next.
- Enter the password for the account → Now, hit Continue.
How to start Mac in Internet Recovery mode
If your Mac’s boot drive is corrupted or you’ve connected a blank storage drive without macOS on it, your computer will flash a question mark folder icon whenever you press the power button and shut down.
In such cases, you’ll need to boot the Mac in Internet Recovery mode to reinstall macOS. Internet Recovery mode allows your Mac to install the necessary recovery tools from Apple servers.
On Intel-based Macs
- Restart your Mac by holding the power button for at least 30 seconds.
- Once you see the Apple logo, you may press and hold the following keys:
- Option + Command + R: Use this key combination to reinstall macOS and upgrade to the latest version of macOS compatible with your Mac.
- Option + Shift + Command + R: To reinstall the version of macOS that came with your Mac or the closest version that’s available.
- Hold until you see a spinning globe and a message that says “Starting Internet Recovery.”
- In case a Wi-Fi menu appears, select your Wi-Fi network and enter the Wi-Fi password.
- Wait for your Mac to initialize all the utilities and boot into Internet Recovery Mode.
On Apple Silicon Macs
Internet Recovery mode is only available on Intel-based Macs released after 2009 that can run OS X Lion or above.
On Apple Silicon Macs, the Internet Recovery mode is bundled with the standard macOS Recovery Mode, so booting your Apple Silicon MacBook into Internet Recovery isn’t different from booting into standard Recovery. In either case, you will require an internet connection.
Unlike Intel-based Macs that automatically ask you to connect to your Wi-Fi network, you will need to ensure the Apple Silicon Mac is connected to Wi-Fi by clicking the Wi-Fi icon at the top.
How to exit Recovery Mode on Mac
Once you’re done using the utilities in Recovery Mode on your Mac, it’s essential to know how to exit this boot environment and return to macOS.
Fortunately, this is quite simple, as I have shown below:
- Simply click the Apple logo at the top-left corner of the screen.
- Select Restart to boot into macOS or Shut Down to turn off the Mac.
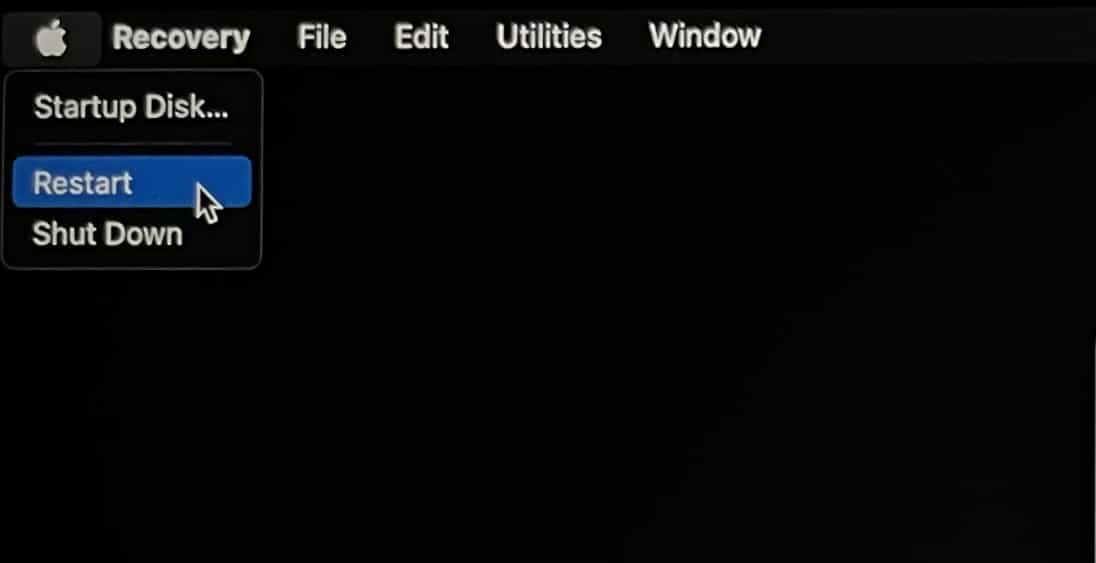
If you initiate a restart, your Mac will automatically exit Recovery Mode and attempt to boot into the regular macOS environment.
If you’ve successfully fixed errors that necessitated the use of Recovery Mode, your Mac should now turn on and load macOS from the boot partition as usual.
Wrapping up…
There you have it, folks. By following the steps outlined in this guide, you will be able to easily start Recovery mode on your Mac to access powerful utilities for troubleshooting various software and hardware issues.
If you have any additional questions, please leave them in the comments section.


