How to Make and Receive Phone Call on Mac and iPad?
When you own multiple Apple devices, the ecosystem lets you enjoy some handy features. Among these is the iPhone’s cellular calls feature that lets you make and receive phone calls on your iPad and Mac. This can be super convenient when you’re away from your phone or don’t want to switch devices while working.
System Requirements
- All devices must have Wi-Fi turned on and connected with the same Wi-Fi network as your iPhone.
- You can only take calls on your Mac or iPad if it fulfils continuity system requirements and placed near each other.
- All your Apple devices must be signed in to FaceTime and iCloud using the same Apple ID.
Table of Contents
How to Turn On Allow Calls on Other Devices
- Launch the Settings app on your iPhone.
- Go to Phone settings.
- Select Calls on Other Devices.
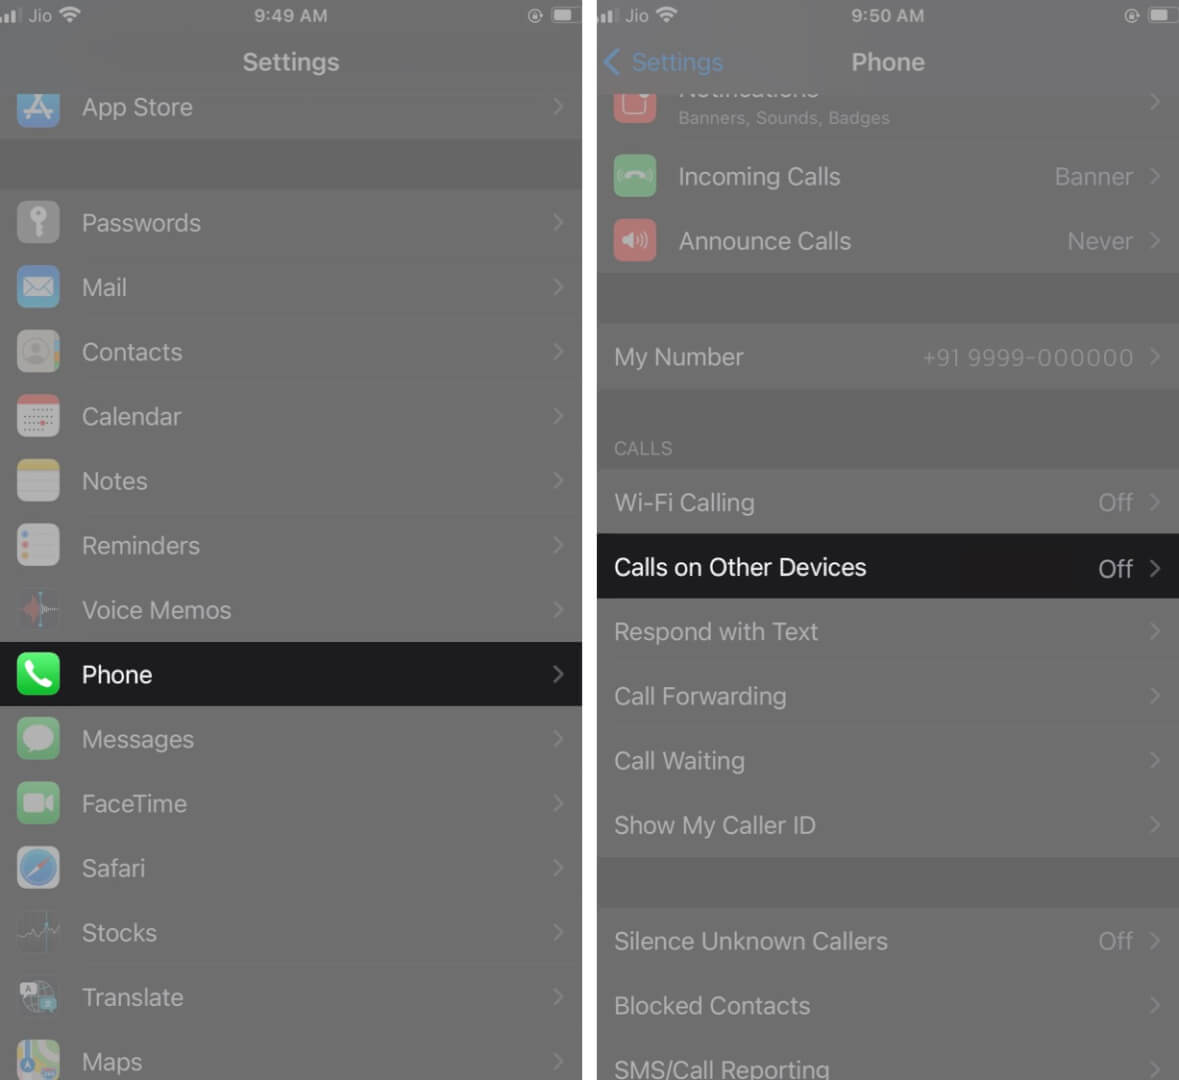
- Enable the toggle Allow Calls on Other Devices.
- Under the same settings, select your preferred devices on which you wish to attend iPhone calls.
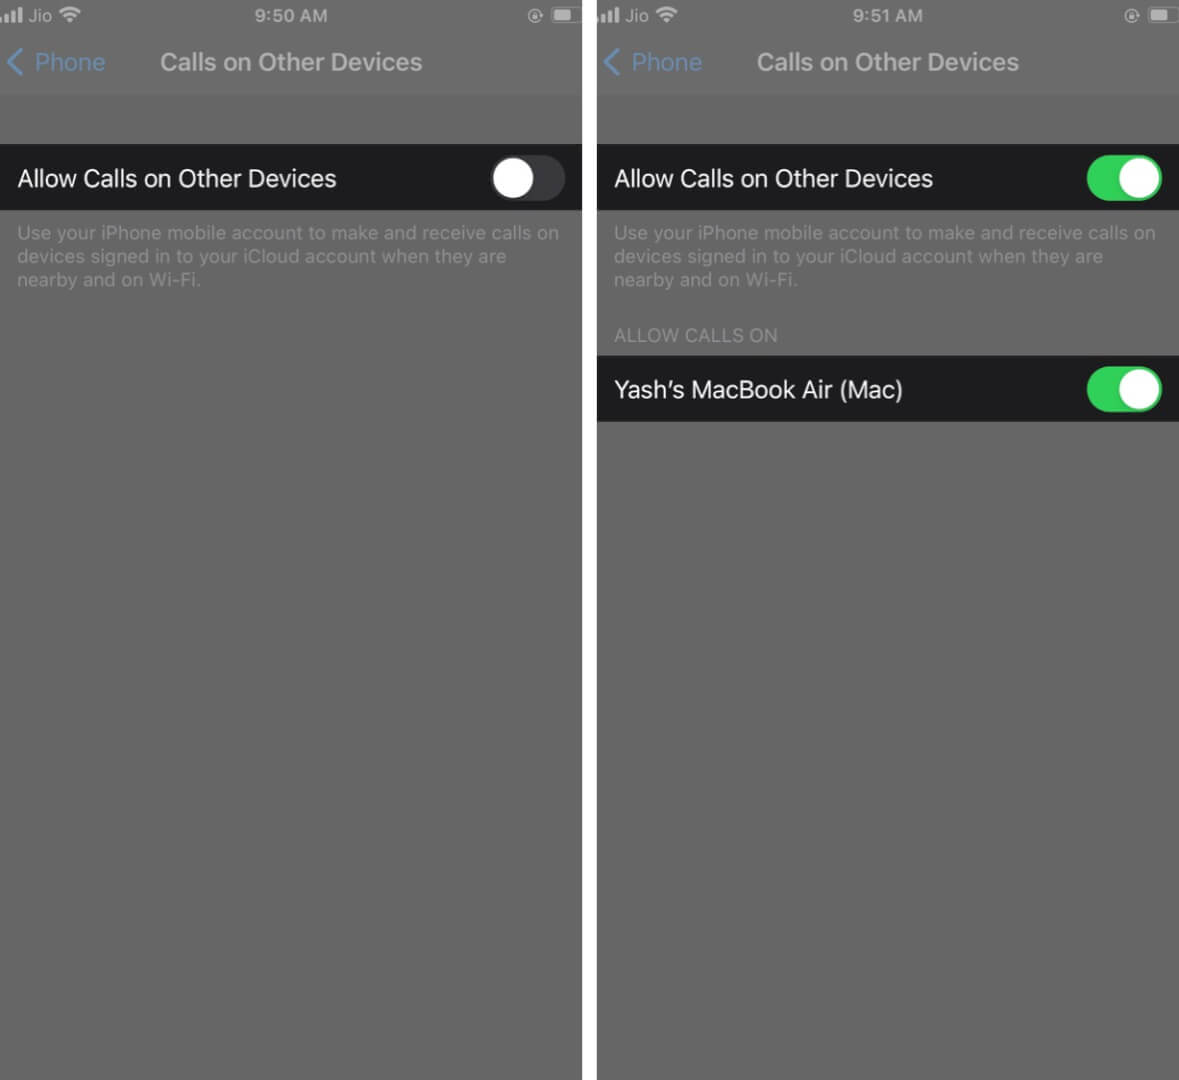
The feature is activated. However, you’ll also have to set it up on your other devices to manage cellular calls.
Allow Calls on Mac
- Launch the FaceTime app on your Mac.
- Click on the FaceTime menu at the top of the screen.
- Click Preferences.

- Tick the Calls From iPhone checkbox.
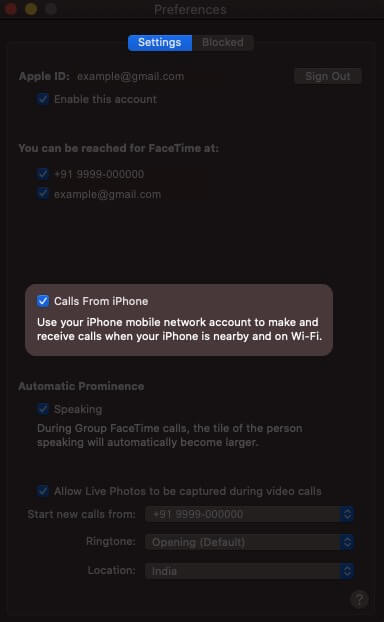
Your Mac is configured, and now you can make and receive calls using the iPhone cellular network.
Allow Calls on iPad
- Open the Settings app.
- Navigate to the FaceTime settings.
- Turn ON the toggle, Calls from iPhone.
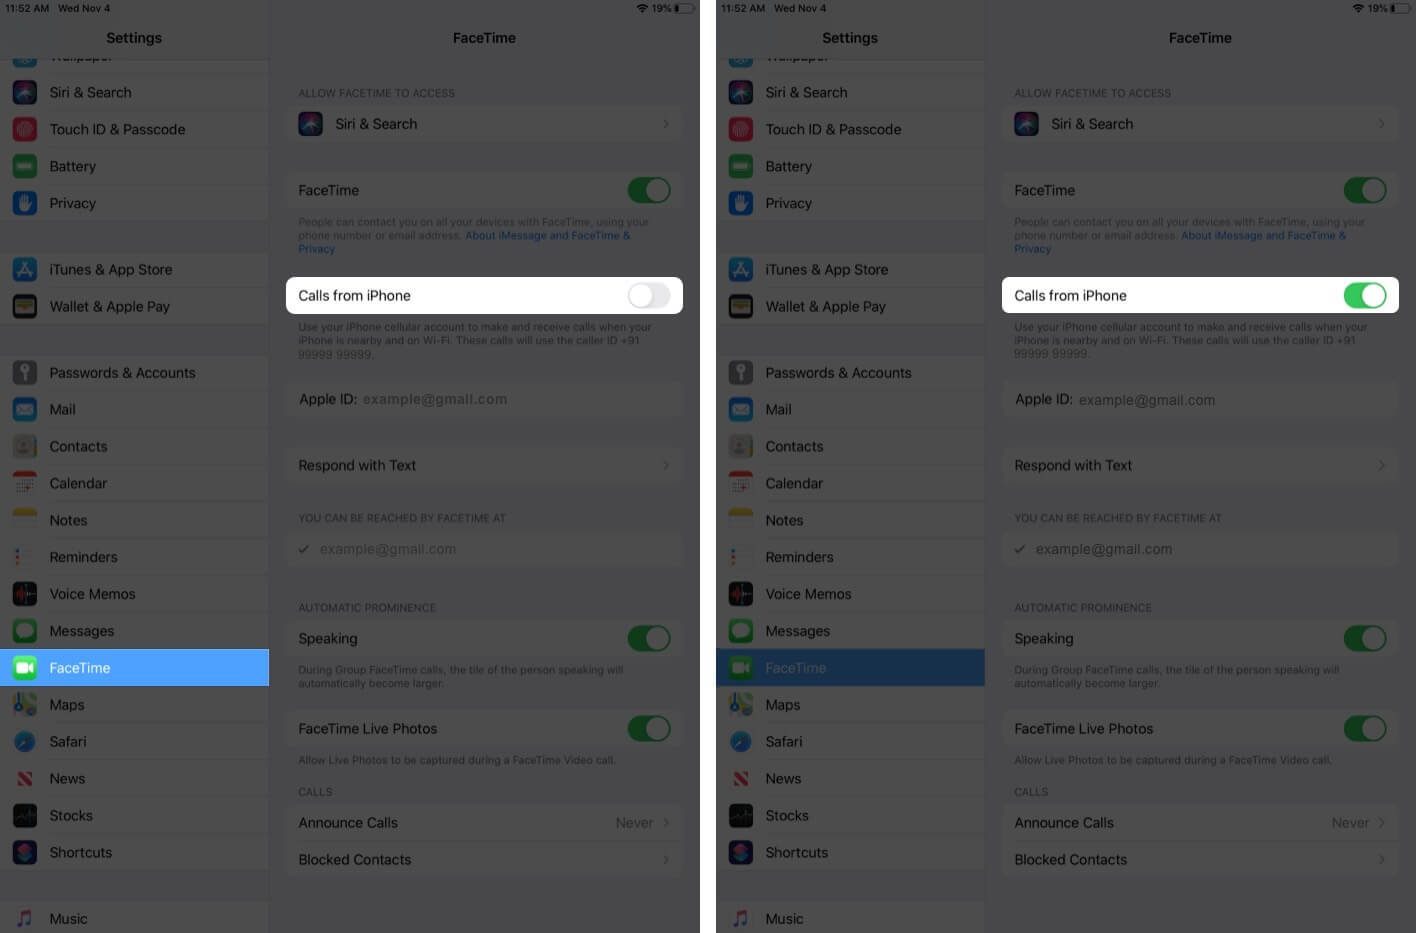
The feature is activated on your Mac. However, you’ll also have to set it up on your other devices to manage cellular calls.
How to Make and Receive Call on iPad?
- Open the FaceTime app on your iPad. (make sure your iPhone is placed nearby)
- Tap on the “+” button.
- Type contact number, email ID, or the name of the contact.
- Hit Audio to start the call.
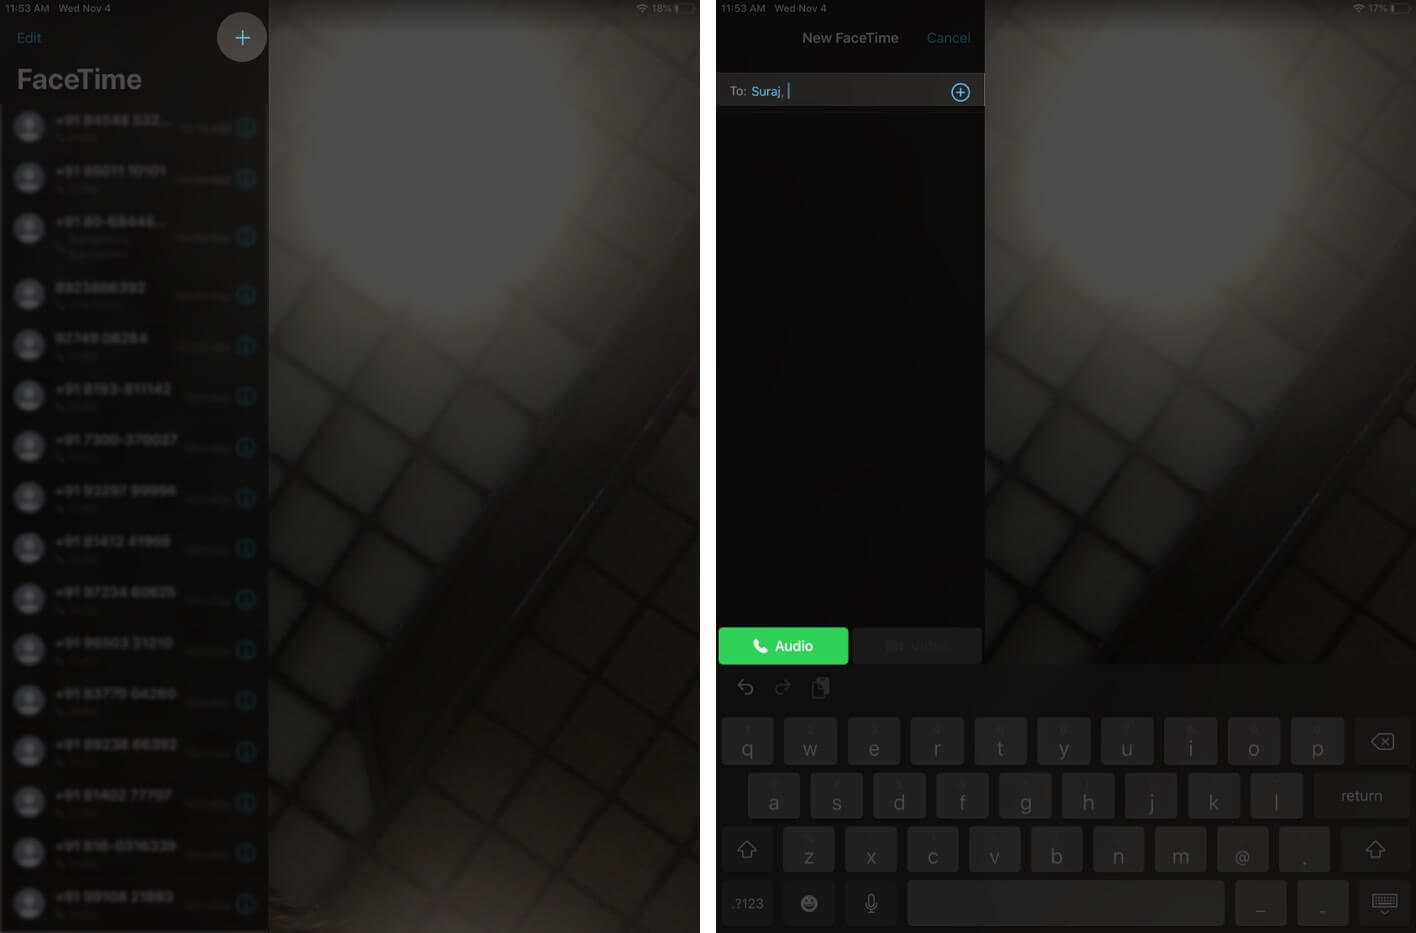
Launch the Contacts app → Tap on a Contact Name → Hit Call. (You can use the Contacts app to make calls.)
When somebody calls you on your iPhone, you’ll receive a notification on your iPad if placed nearby. You can accept or decline it accordingly. You can also put a reminder to respond to it later.
How to Make and Receive Call on Mac?
- Open the FaceTime app on your Mac.
- Write a name, email, or the number of the person you’d like to call.
- Click on the Audio button at the bottom.

- Use Mute or End to manage the call.

You can also call someone using the Contacts app on your Mac.
Launch the Contacts app → type the contact name in the search bar → From the contact information on the right, click the Call button.

When you receive a call on your iPhone, you’ll be notified on your Mac. Accept or decline it as per your preference. If accepted, choose mute it, or end the call.
Note that you’ll need an external microphone to manage your calls on Mac.
Transfer Calls from iPhone to iPad or Mac
- Open the Phone app on your iPhone.
- Select the Contact you want to call.
- On the caller ID, tap Audio.
- Select Mac or iPad from the options.
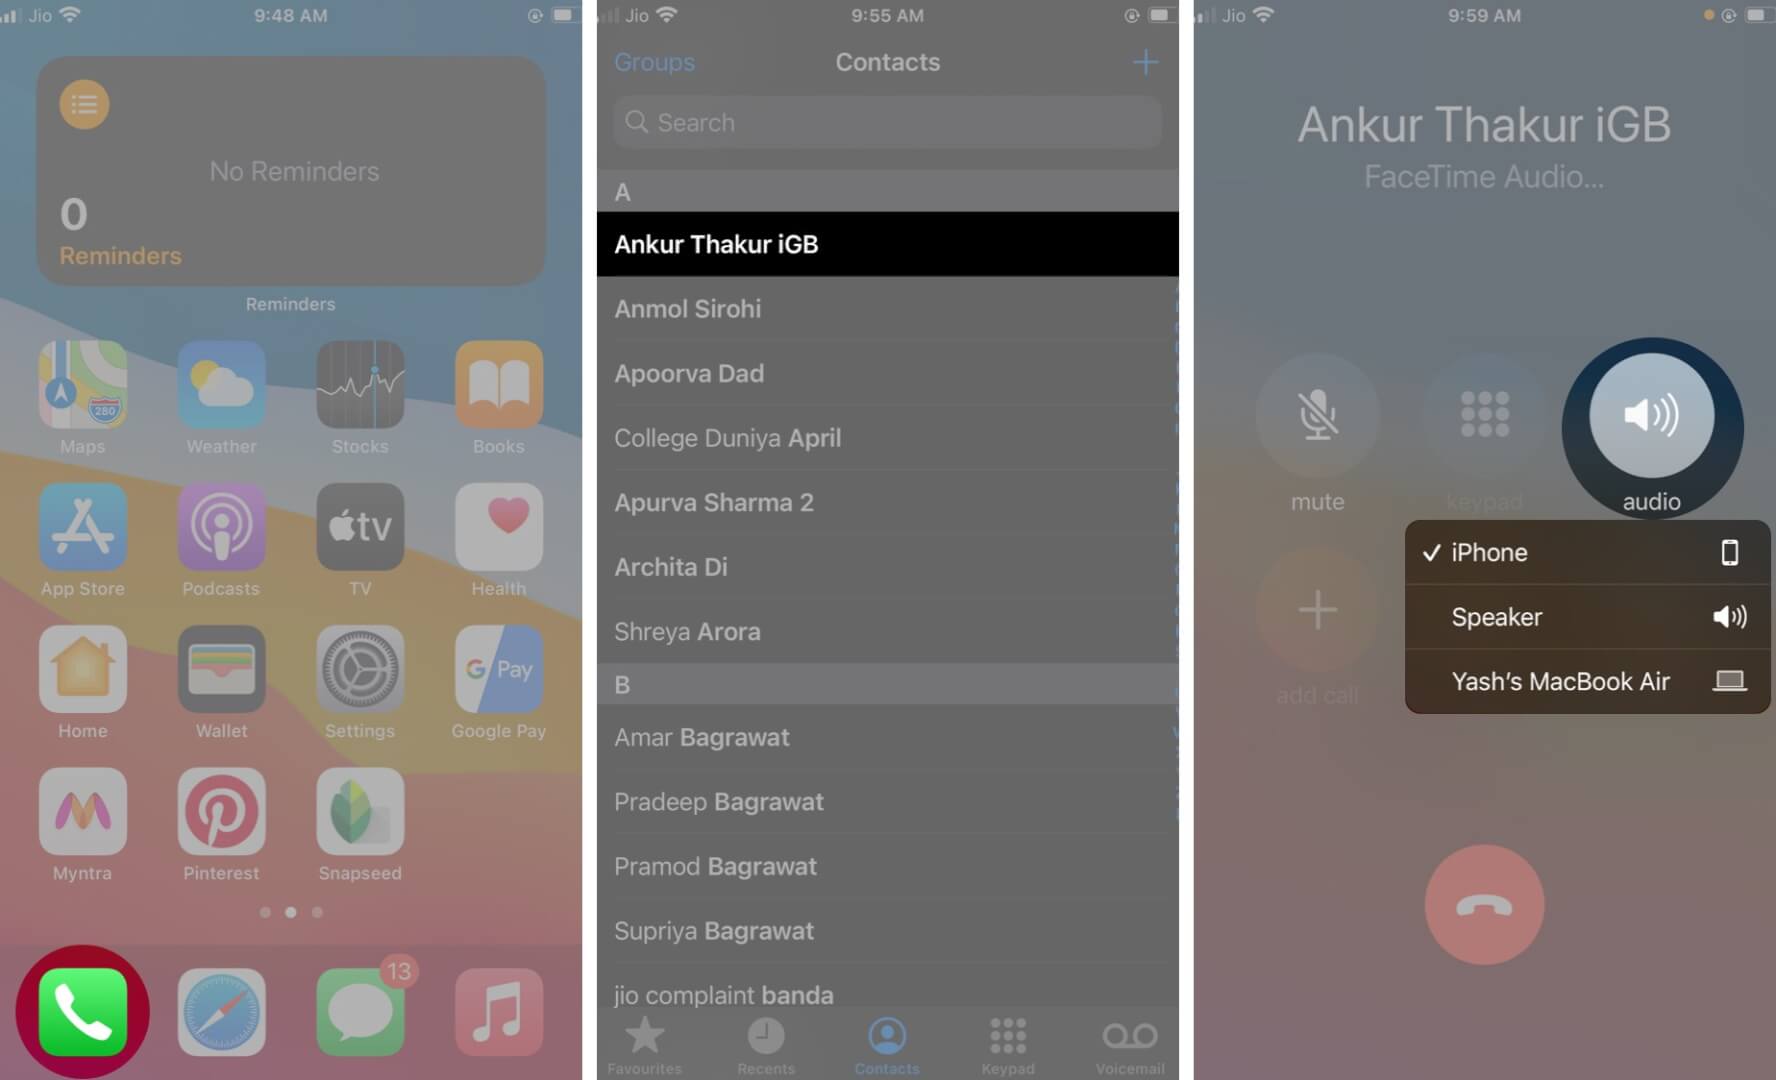
The call will be redirected to your selected device.
How to Stop iPhone Calls on Other Devices?
Disable access from your iPhone Settings.
- Launch Settings app → Select Phone → Calls on Other Devices → toggle Turn OFF the device you don’t want to use.
Disable iPhone Calls on your iPad
- Open Settings app → FaceTime → toggle off Calls from iPhone.
Disable iPhone Calls on your Mac
- Launch FaceTime app → Preferences → Untick the checkbox Calls From iPhone.
Easy to Make and Receive a Phone Call on Other Devices
This is a complete guide about how to your iPad and Mac can handle phone calls. This can come in several situations and helps to ease the workflow. Share your thoughts about this feature in the comments below.
You might also like to check out:


