How to Scan Documents on iPhone With Notes and Files App
Scanning documents on an iPhone is pretty straightforward. Here's how to scan documents on your iPhone using the Notes and Files app.
Key Takeaways:
- You can scan documents directly using the Notes or Files app on your iPhone or iPad, no extra app or subscription required.
- In Notes, tap “Scan Documents” and align your paper, then capture, adjust edges, and save as a single or multi-page PDF.
- The Files app also offers scanning tools, letting you save scanned PDFs straight into iCloud Drive or local folders for better organization.
- After scanning, you can crop, rotate, delete, or annotate your PDF, or even sign and share it—all within iOS without extra software.
- iPhone scanning supports multi-page PDFs and free editing, making it a simple option for students, professionals, and quick digital filing.
Need to store important information on your phone? One of the easiest ways to keep track of your rental agreement, bills, and doctor’s notes is to scan the document on your iPhone or iPad.
The process is pretty simple and can be done through a few different apps. Here’s our step-by-step guide on how to scan documents on an iPhone or iPad running iOS 17 or iOS 18.
How to scan a document on iPhone using Notes
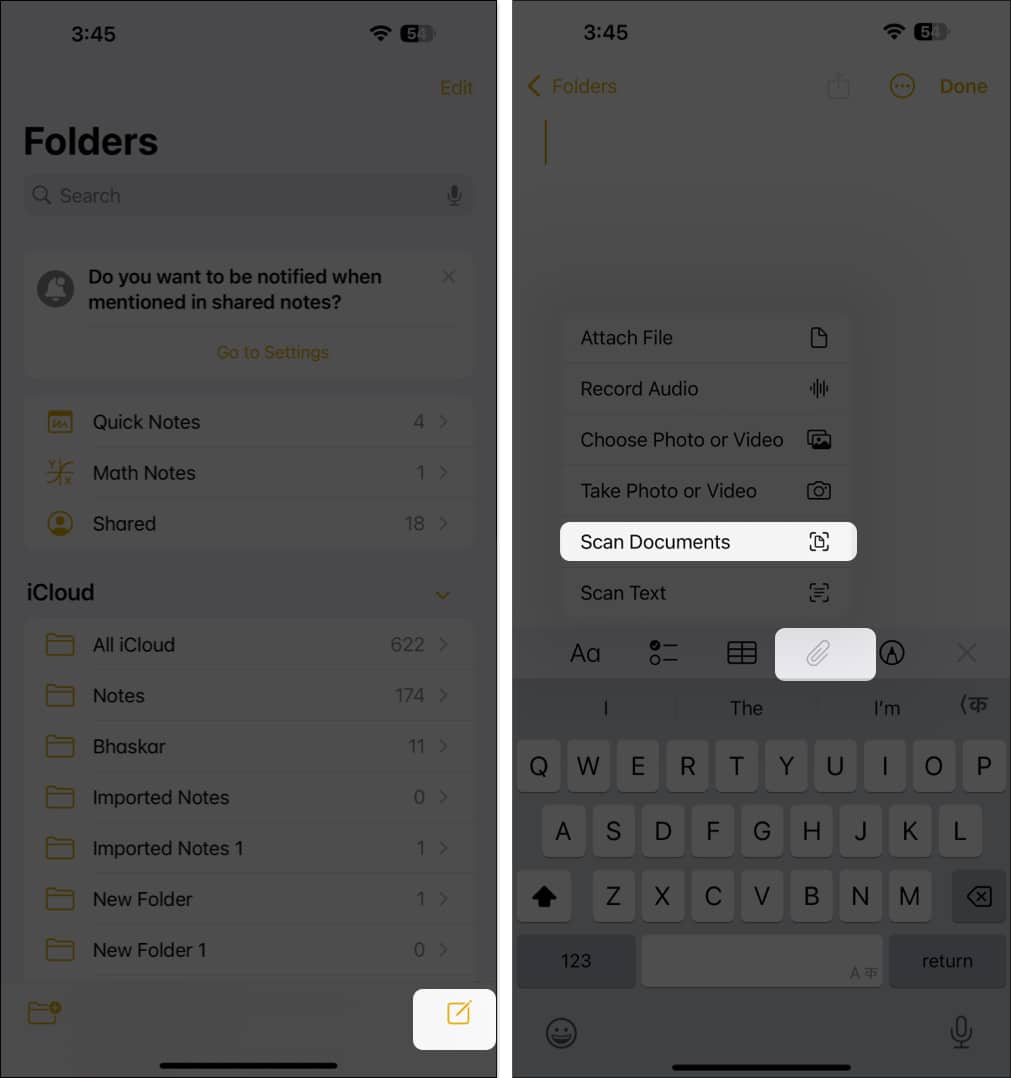
- Launch Notes and tap the compose icon.
- Tap the Attachment icon and select Scan Documents. In iOS 17, tap the Camera icon and select Scan Documents.
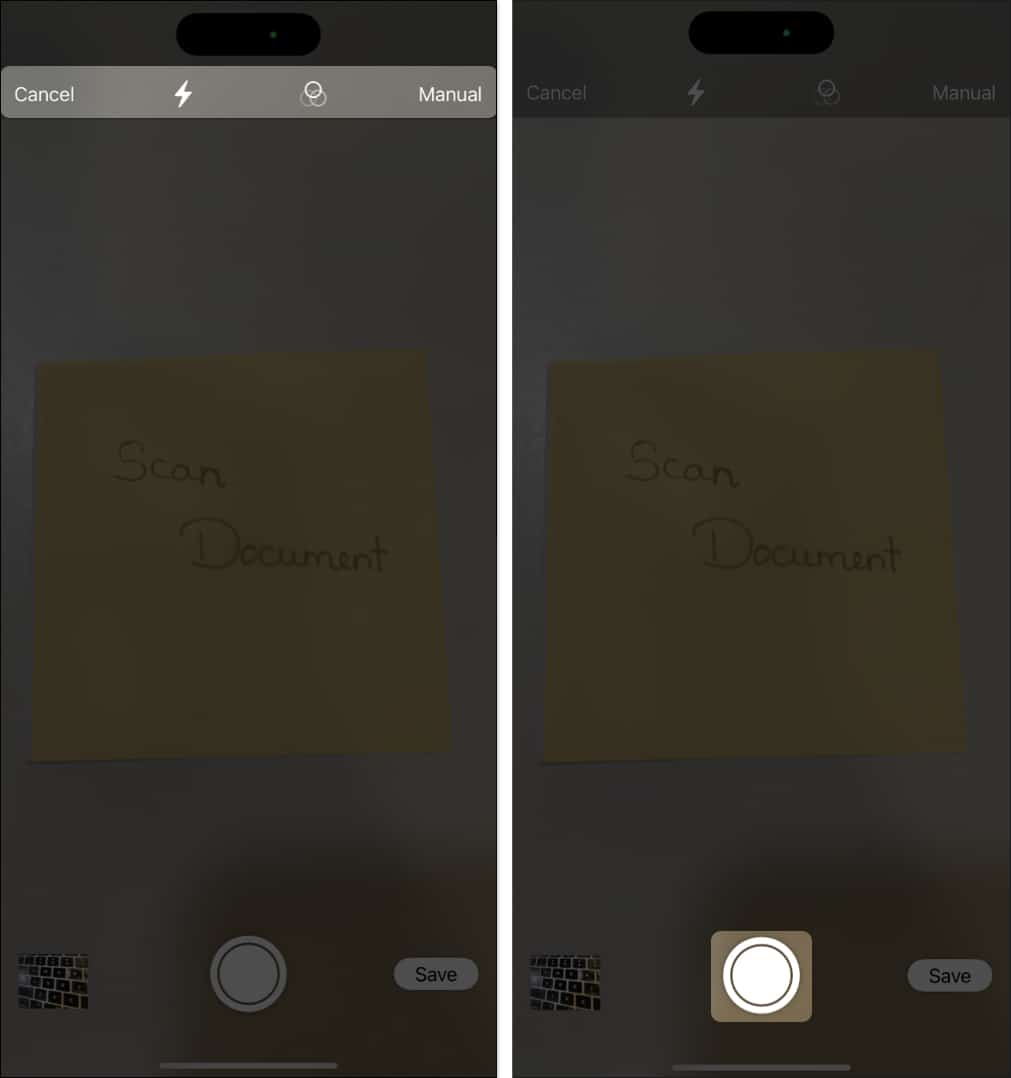
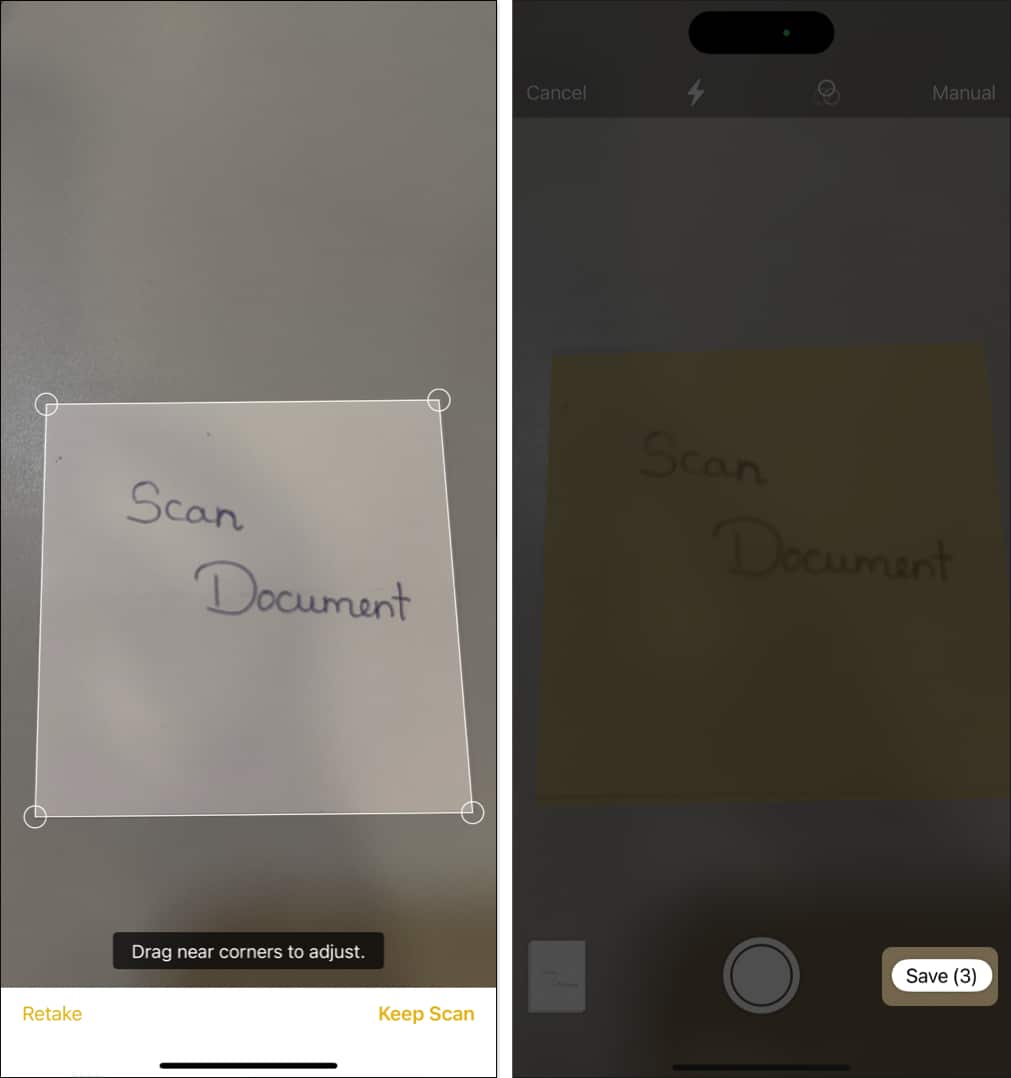
- Make sure to get the entire document in the frame. There are a few tools that can help you out:
- Lightning icon – This toggles the flash between, Auto, on or off.
- Filters (three interlocking circles) – This lets you select between Color, Greyscale, Black & White, and Photo filters.
- Focus – Tap Auto or Manual to switch between the two.
- Next, tap the Shutter button.
- Here, you can do the following:
- Adjust edges – For cropping out parts of the scan
- Retake – If you need to take another shot.
- Keep Scan – Tap this when you’re happy with the scan.
- If you have more than one page, move on to the next one and tap the Shutter button to scan it.
- Once done, tap Save.
Notes will now save a PDF of the document you scanned. You can tap the document for a full-screen view. At this point, you can:
- Add more pages (+ icon)
- Crop the page/pages
- Add or change filters
- Rotate the page/pages
- Delete it
- Share it via message, email, AirDrop, or email.
- Sign and annotate the scanned document
And you’re all set. That’s how you can scan documents using the Notes app on your iPhone or iPad.
If you’d rather use the Files app, read the next section.
How to scan a document on iPhone using the Files app
The Files app lets you scan documents on your iPhone or iPad and makes the doc easily accessible even in third-party apps like WhatsApp, email, etc. The process is pretty similar to using the Notes app. Here’s what to do.
- Open the Files app and tap Browse.
- Now, decide where you wish to save your scanned docs.
- You can select On My iPhone, iCloud Drive, etc. You can also create a new folder or select an existing one.
- Tap the more icon (three dots inside a circle) at the top right.
- Choose Scan Documents.
- Hold your iPhone steady over a document and tap the shutter button.
At the top, you can choose to enable flash, set color filters, and enable an auto shutter that automatically clicks the picture when it detects a document. - Drag near the corners to adjust the cropping and tap Done once satisfied.
- Once done, tap Save.
- Optional: Tap the shutter button to scan more documents.
- The digital copy of the document is now saved in the Files app.
That’s all there is to it. Now you know how to scan and save documents using the Files app—we also have a guide on using the Files app on your iPhone or iPad like a pro if you’re looking for more useful tips and tricks.
Signing off…
Whether you use Notes or Files, scanning a document with your iPhone or iPad is as easy as tapping “scan document,” hovering your camera over the physical paper, and snapping a photo.
With your newly scanned document saved as a PDF, you can sign it, annotate it, and share it with others right from your iOS device.
Do you have any other Apple-related questions? Let us know in the comments below, and we’ll do our best to help you out!
FAQs
Our reviews team prefers the Scanner App. Check out our list of the best document scanner apps for iPhone for more information.
Yes. Whether you use the Files or Notes app, you will have the option to scan additional pages into a single document.
Also Read:


