Mac keyboard shortcuts for Apple Notes: The ultimate guide
This article is your ultimate guide to keyboard shortcuts for Notes on Mac.
Key Takeaways:
- Why Use Shortcuts: Using keyboard shortcuts in Apple Notes on your Mac significantly speeds up your note-taking workflow.
- Basic Actions: Use basic shortcuts like `Command+N` for new notes and `Command+D` to duplicate them quickly.
- Formatting Text: Quickly format notes with shortcuts like `Shift+Command+H` for headings and `Command+B` for bold text.
- Advanced Navigation: Use `Command+F` to find text and other shortcuts to easily create and navigate tables in notes.
- Custom Shortcuts: Create your own shortcuts for any menu command via System Settings for a fully personalized workflow.
Apple Notes is an easy-to-use note-taking app for keeping and organizing your thoughts and ideas on a Mac. If you use it extensively, you must take advantage of its various keyboard shortcuts to elevate your note-taking experience. These shortcuts let you edit, format, and organize notes faster, saving you the hassle of navigating menus for simple tasks.
Below, we’ve curated a list of essential Mac keyboard shortcuts for Apple Notes. We’ll also show you how to create custom shortcuts for Apple Notes on a Mac. Keep reading to find out!
Best keyboard shortcuts for Notes app on Mac
While you can find keyboard shortcuts for most functions in the Apple Notes menu bar, we’ve rounded up some of the most important ones for easy reference.
Basic shortcuts for everyday use in Apple Notes
- Create a new note: Command+N
- Create a new Quick Note: Fn+Q (works anywhere on your Mac for quick access to Notes, as long as you haven’t changed the keyboard settings)
- Duplicate a note: Command+D
- Create a new folder: Shift+Command+N
- Show or hide folders/sidebar: Command+Option+S
- Show the main Notes window: Command+0 (Zero)
- Move between the sidebar, notes list, and search field: Tab (this doesn’t work if you’re currently editing a note)
- Show notes in a list: Command+1
- Show notes in gallery view: Command+2
- Show attachments: Command+3
- Attach a file: Shift+Command+A
- Link a note: >>
- Print a note: Command+P
- Delete a note: Command+Delete (click the note you want to delete before using the shortcut)
- Quit the Notes app: Command+Q
Note editing and formatting shortcuts
Formatting
- Apply Title format: Shift+Command+T
- Apply Heading format: Shift+Command+H
- Apply Subheading format: Shift+Command+J
- Apply Body format: Shift+Command+B
- Apply Monostyled format: Shift+Command+M
- Apply Bulleted List format: Shift+Command+7
- Apply Dashed List format: Shift+Command+8
- Apply Numbered List format: Shift+Command+9
- Apply Block Quote format: Command+’
- Apply Checklist format: Shift+Command+L
Font size and color
- Show Fonts window: Command+T
- Bold text: Command+B
- Italic text: Command+I
- Underline text: Command+U
- Increase font size: Command+Plus sign
- Decrease font size: Command+Minus sign
- Show Color window: Shift+Command+C
List
- Increase list level: Command+] or Tab
- Decrease list level: Command+[ or Shift+Tab
- Add a line break (soft return) to a list item or checklist: Shift+Return
- Insert a tab character in a list item: Option+Tab
- Mark or unmark a checklist item: Shift+Command+U
- Move a list or checklist item up in the list: Control+Command+Up Arrow
- Move a list or checklist item down in the list: Control+Command+Down Arrow
Other formatting shortcuts
- Create a link: Command+K
- Select an emoji: Control+Command+Space
- Copy style: Option+Command+C
- Paste style: Option+Command+V
- Show spelling and grammar: Command+Shift+: (the Shift key is included in this shortcut to press : instead of 😉
- Zoom in on note’s contents: Shift+Command+>
- Zoom out on note’s contents: Shift+Command+<
- Change size of note’s contents to default: Shift+Command+0 (Zero)
Searching and filtering
- Find in currently opened note: Command+F
- Find in all notes: Option+Command+F
- Find next: Command+G
- Find previous: Shift+Command+G
- Use selection for find: Command+E
- Jump to selection: Command+J
Table shortcuts
- Insert a table: Option+Command+T
- Add a row above the current one: Option+Command+Up Arrow
- Add a row below the current one: Option+Command+Down Arrow
- Add a column to the right: Option+Command+Right Arrow
- Add a column to the left: Option+Command+Left Arrow
- Move down a row or create a new row at the bottom: Return
- Move up a row or exit the table when at the first row: Shift+Return
- Go to the next cell on the right: Tab
- Go to the previous cell on the left: Shift+Tab
- Insert a new paragraph inside a cell: Option+Return
- Insert a tab character in a cell: Option+Tab
- Select cells across a row: Shift+Left Arrow or Shift+Right Arrow
- Select cells across a column: Shift+Up Arrow or Shift+Down Arrow
- Highlight the content of the current cell: Command+A
(If not inside the table, this shortcut selects the entire note.) - Highlight the entire table: Command+A (press twice)
(If not inside the table, pressing Command+A selects the entire note.)
Customizing keyboard shortcuts for Apple Notes on Mac
Some functions in the Notes app, like the Lock Note menu or the Check Spelling While Typing menu, don’t have keyboard shortcuts by default. However, you can create your own keyboard shortcuts for these. Here’s how:
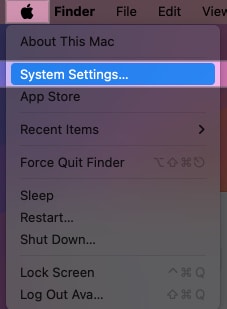
- Click the Apple menu in the top-left corner of your Mac and select System Settings.
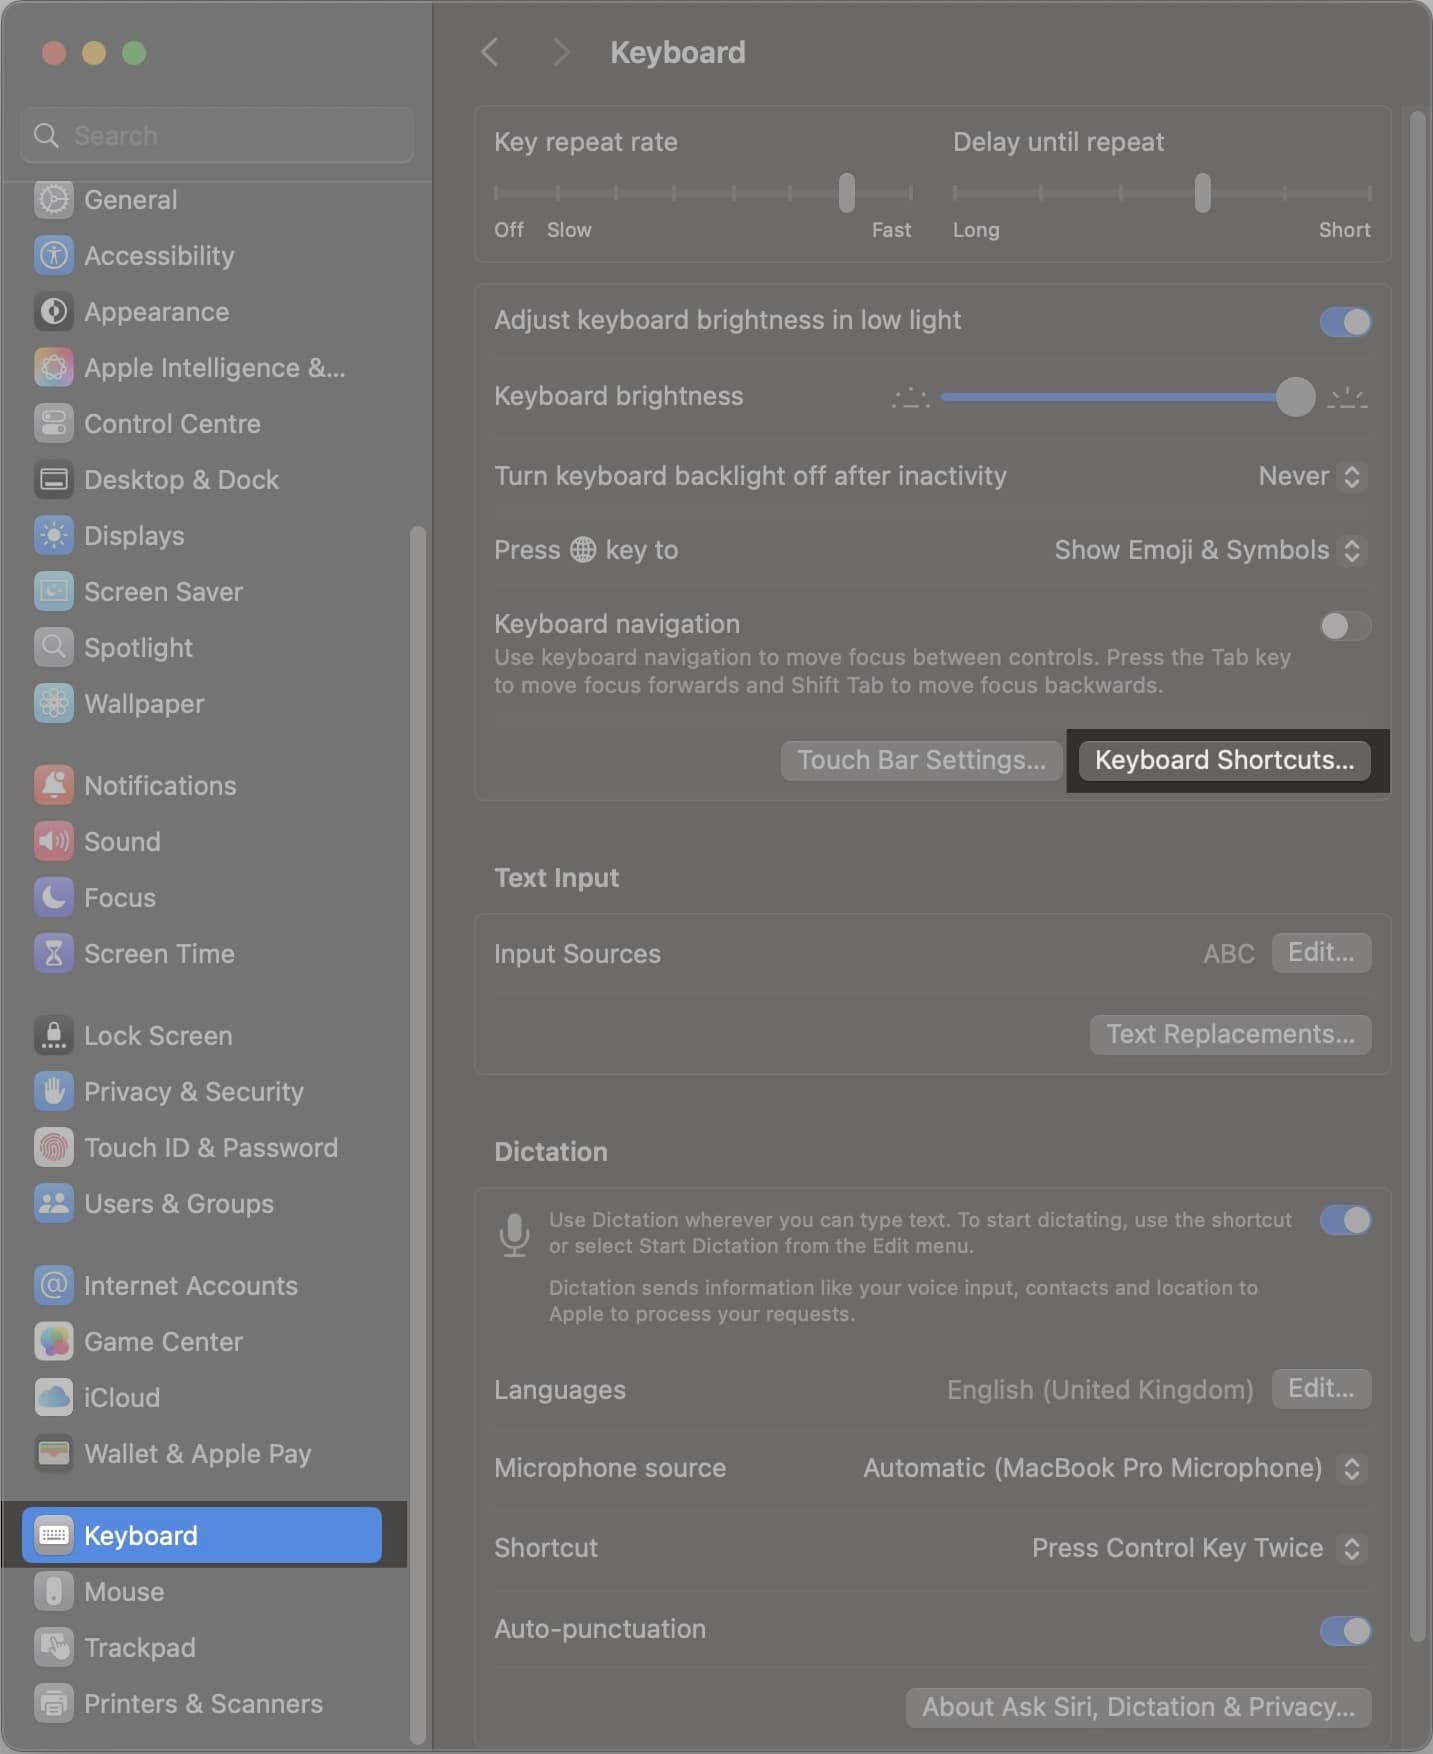
- Select Keyboard from the sidebar, scroll down, and click Keyboard Shortcuts.
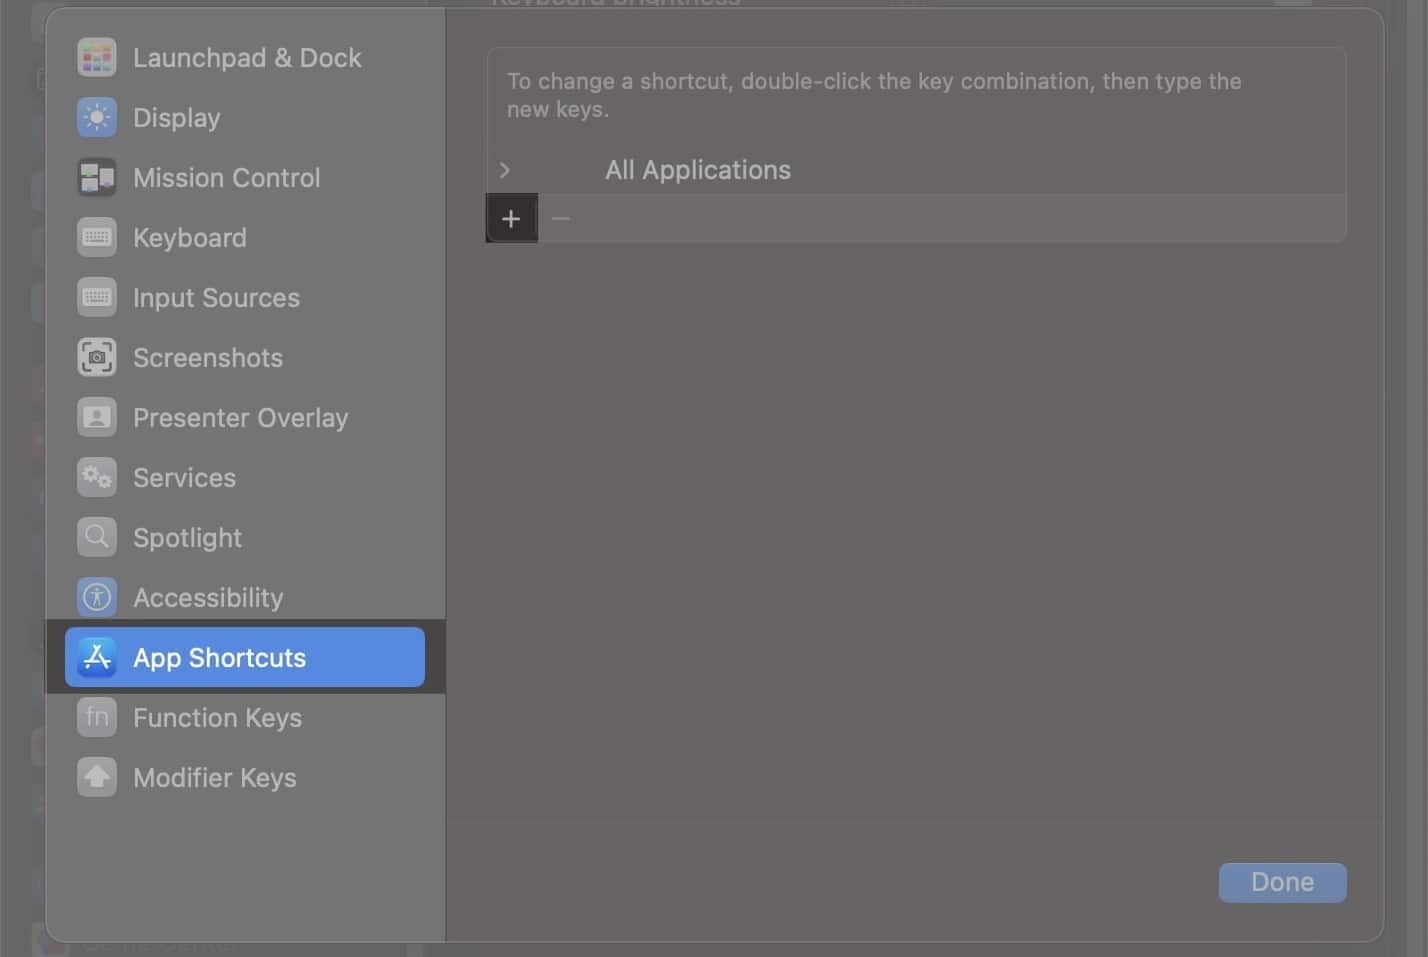
- Choose App Shortcuts from the left, then click the + icon under All Applications.
- Click the drop-down button next to Application and select Notes as the app you want to create a shortcut for.
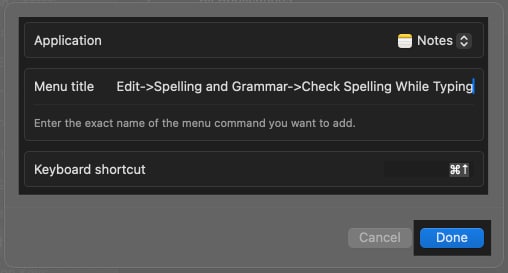
- In the Menu Title field, type the exact command leading to the menu you want to assign a keyboard shortcut for as it appears in the Notes app. For example, if you want to create a shortcut for the Check Spelling While Typing menu, you need to enter: Edit->Spelling and Grammar->Check Spelling While Typing. Remember to use a hyphen before the ‘>’ symbol with no spaces in between each menu, and ensure the menu title matches exactly as it appears in the app.
- Click the Keyboard Shortcut field, press the key combination you want to assign, and then click Done.
Similarly, you can also customize existing shortcuts if the default options aren’t convenient for you.
Discover essential resources to help you unlock your Mac’s full potential!
- Ultimate Guide to Mac Option Key—This comprehensive guide covers all the hidden features and shortcuts of the Mac option key, helping you use it like a pro.
- 300+ Mac Keyboard Shortcuts for Beginners and Pros – Master your Mac with over 300 keyboard shortcuts designed to boost your productivity and make your workflow seamless.
Get them both now on Gumroad and level up your Mac experience!
Signing off…
The shortcuts above should have you covered on most fronts and reduce dependence on the mouse or Trackpad in the Notes app, especially for trivial actions. So go ahead and develop a command over them to improve your workflow in the Notes app on your Mac.
Also read:


